Inventory Manager
The Inventory Manager page is your inventory hub. Here you can:
- View what product you have in stock across your different warehouses.
- Make stock transactions i.e. add/subtract stock against a particular warehouse.
- Export stock data.
- Import updated stock data and new product data.
The Inventory Manager page can be found by clicking the 'stacked boxes' button in the navigation bar as shown below.
NB: If you cannot see this icon you have NOT been given access it module. If you belive you should be then please contact your application system administrator.
Once landed on the Inventory Manager page, you will see an overview of all products and their current stock quantities and will be able to carry out a number of which will be outlined later in this document.
This Inventory module holds all inventory records and their relevent data. It is essentially the ‘master’ table which makes up the list of products held in stock, whether that stock is available or reserved and via it’s relationship to the warehouses table, where that stock is being held.
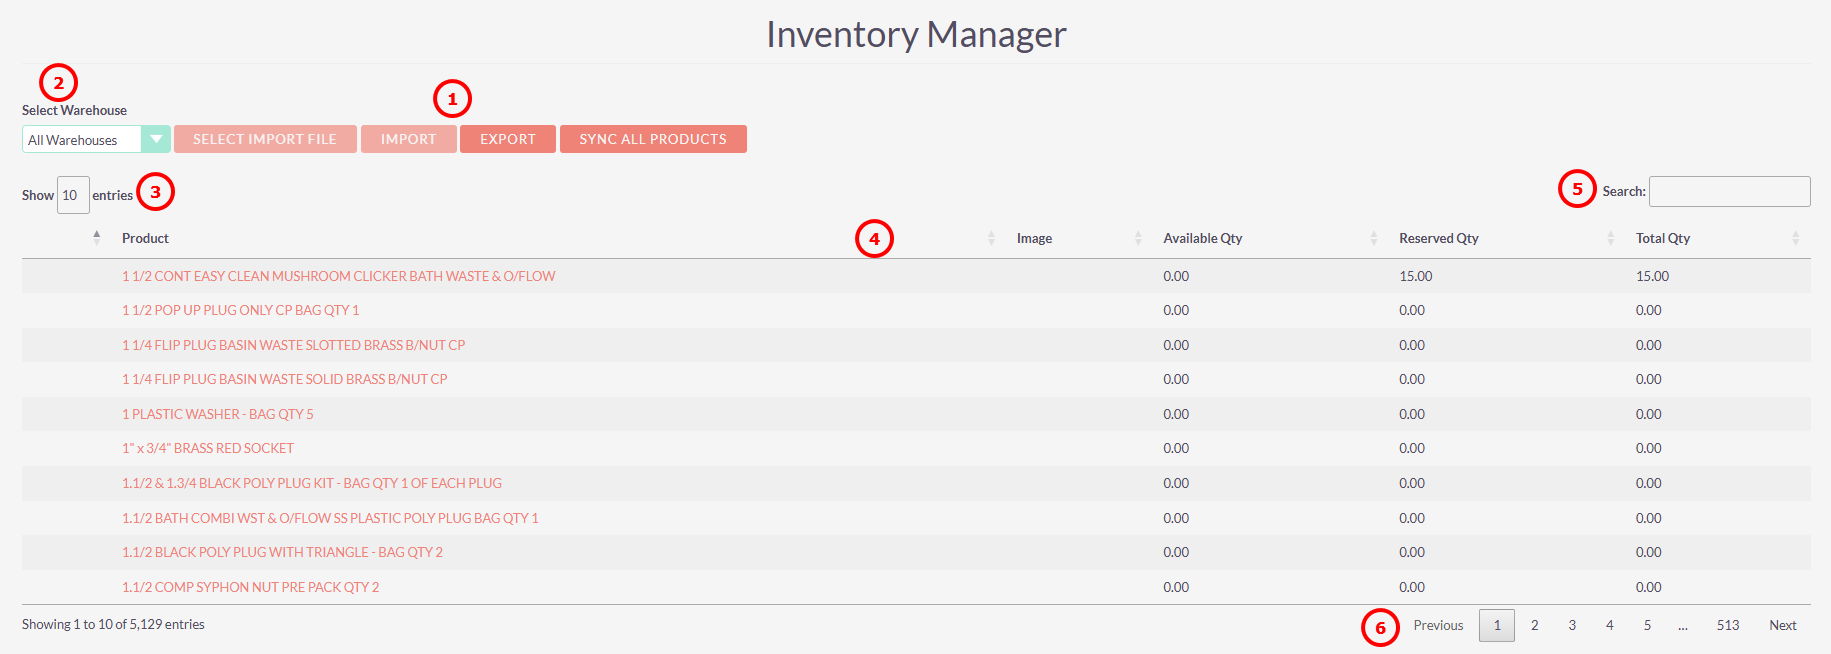
Below is the screenshot and explainer of the inventory page.
- Import and Export Inventory stock. This is useful for bulk inventory changes.
- Warehouse Selector
- Select the number of entries to view
- View inventory details
- Search for specific products
As shown above this page lists all inventory products and their quantities.
Available Qty refers the amount of stock currently available.
Reserved Qty refers to the amount of stock currently reserved against a specific job, and therefore unavailable to be used.
Total Qty refers to the total amount of stock held, i.e. The sum of available and reserved quantities.
Select Warehouse Dropdown
The select warehouse dropdown defaults to All Warehouses and will show the aggregate quantities of products held across ALL warehouses.
Selecting a specific warehouse from the dropdown will drill down into the quatities held in the selected warehouse.
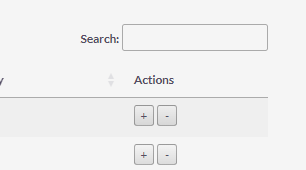
It will also add an additional ‘Actions’ column to the product table as shown below:
Clicking on the +/- buttons will open the respective add/subtract stock quantity modal which will allow for manual adjustments of available stock levels:
Export Button
If all warehouses is selected, the export wil show the aggregated numbers and not have any warehouse specific information. It currently looks as follows:
If a specific warehouse is selected then the export looks slightly different as it also has a ‘Warehouse’ column specifying where the stock is held and it will only detail stock held in that location:
Import Buttons
Updates to inventory data can be done en masse by utilising the import feature. The inventory data must be imported for a specific warehouse, therefore when ‘All warehouses’ is selected the buttons are greyed out and unusable.
When a specific warehouse has been selected, the user is given the option to select an import file. This file should be a CSV in the exact format of the export file for a specific warehouse.
Once a file has been selected it can be imported:
After clicking import the selected file will be validated and if all data is in the expected format then the user will be able to proceed with the import and the inventory items will be updated as per the import file:
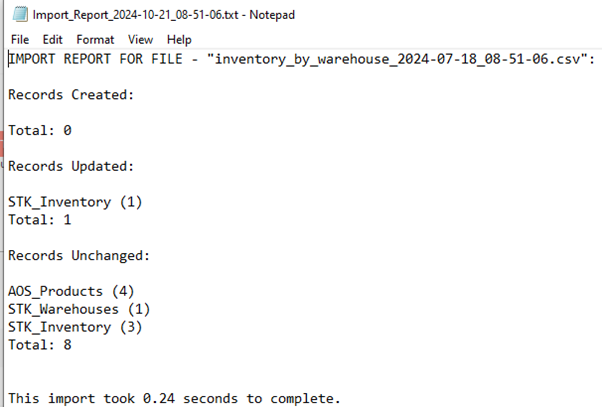
Once the import has completed, the user will get a basic import report as shown below:
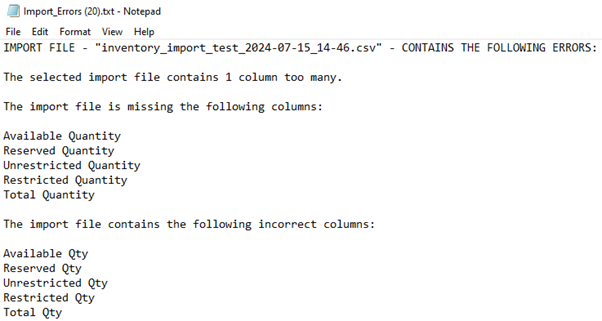
If however, an import cannot be carried out due to the import file failing validation, then the user will get an error report outlining the problems with the import file. The example below shows a case where the import file contains incorrect columns, however, should there be a problem with the data in a particular cell, this will be picked up and fed back to the user in the report:
Sync All Product Buttons
N.B. In order for inventory syncing to happen there must be at least one warehouse created.
Managing Inventory Products
In order for a product to be added to the inventory list, it must exists in the ‘Products’ module and have a status of active.
Adding new inventory products
- If a new product is added to the ‘Products’ module with a status of ‘Active’, it will automatically be added to the Inventory, with a SEPARATE record being created for EACH warehouse (which also has a status of ‘Active’).
- The above method is also valid for products which are added via the product import on the Rakata Import / Export page.
- The ‘Sync All Products’ button can also be used as outlined in the previous section. This method should be used for existing installations which will have this feature newly added, and therefore will need all existing products synced to the the inventory.
- If a product exists but has a status of ‘Inactive’, setting its status to ‘Active’ will add it to the inventory as in method 1.
OR if the inventory product(s) were created previously and now have a status of ‘Inactive’, their statuses wil be reset to ‘Active’ making them usable inventory products once more.
Removing inventory product
- If an existing product with a status of ‘Active’ has its status changed to ‘Inactive’, then all related inventory products will also have their status set to ‘Inactive’ and thus be removed from the usable inventory.
IMPORTANT - Please note that products and their inventory entries should only be deleted in this way (flagging as ‘Inactive’), rather than actual deletion of the record. This way existing quotes / invoices / jobs / POs which reference those products will not be affected.
Ordering / Reserving Products Against Jobs
Stock Tab
The ‘Stock’ tab is visible on the jobs detail view page ONLY if stock management is turned on in Advanced settings.
Job Stock Functionality
The following assumes a quote has been created with products added to it – the products must have a supplier selected a on the quote.
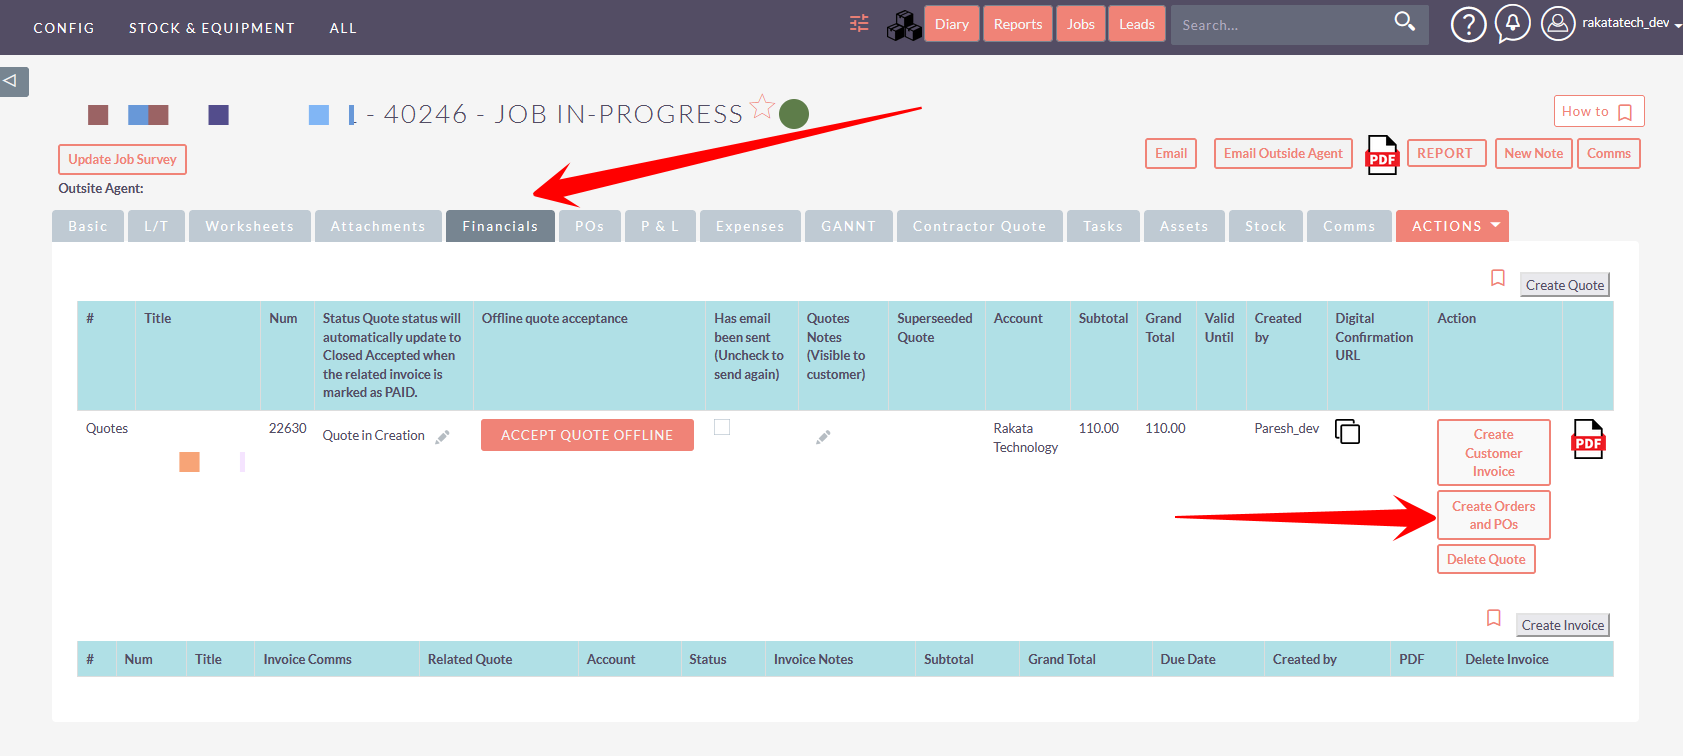
Once a quote has been created with the required products, navigate to the financials tab on the jobs page, where you will find the button ‘Convert Quote to Orders’ (The naming of this button needs changing)
- Create POs for the products on the quote for the selected suppliers.
- Create orders for the required products against the Job.
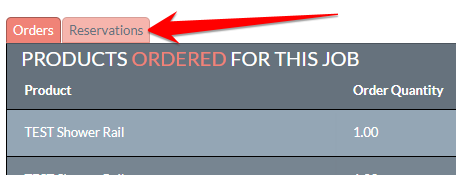
Once this process is complete, under the ‘Stock’ tab you will find the following table contains the orders made against the job. All automatically created orders begin at the ‘Preorder’ stage as shown below (The ‘TEST Shower Rail’ product appears twice as it was added twice to the quote with different suppliers):
Once the POs have been sent or the orders formally placed, the user must mark each product as ordered using the ‘Mark Ordered’ button:
This will change the Order Status to ‘Ordered’ and the button will update to ‘Mark Delivered’.
In order to mark an order as delivered, first a delivery warehouse must be selected:
Then the delivered quantity can be set, and marked as delivered:
Marking an order as delivered will create a stock transaction and increment the available inventory quantity in the designated warehouse by the amount delivered. It will create a reservation for that quantity of product against the given job.
These figures will be reflected in the inventory manager.
Now continuing in the ‘Stock’ section we can navigate to the reservations tab and see the products reserved against this job.
Here we see the quantity of each product reserved against the job, and the breakdown of where those products are warehoused.

