Job & Account Management - Introduction
There are many different ways to accomplish tasks with the CRM. This quick guide illustrates a simple logical flow. As you get more familiar with the system you may use better flows that work for you.
The following guide provides details based on the following flow:
- Create Account
- Create Survey
- Add Rooms and Products (both from the CRM and the Andriod App)
- Make any room adjustments
- Create the customer quote
- Customer Sign-off
- Book a fitting
- Manage the fitting
- Close the job
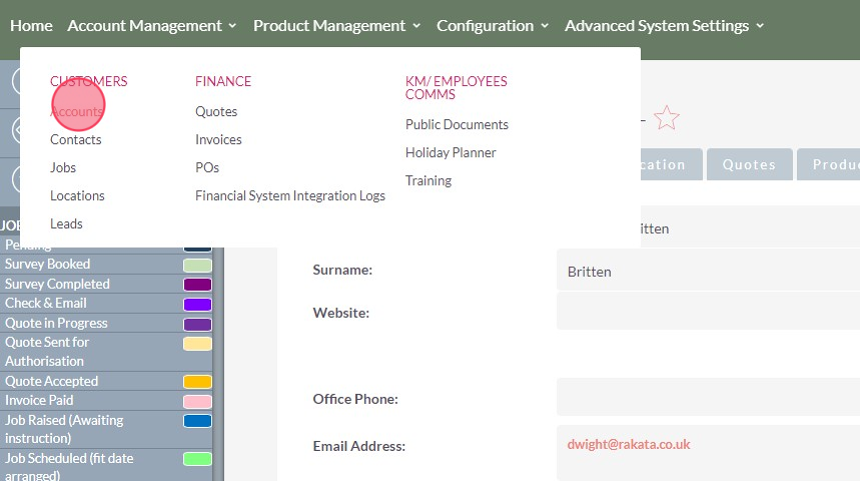
- Creating an Account
- Alternatively, you can create a Job from the Kanban (“Walk In” or “On-Site Survey”)
- Create a Job Survey/Order (Measure Up)
- Create the order (Adding rooms and products)
- Create the Quote > Send the quote > acknowledge the quote!
- Customer Quote Acceptance
- Book a Fitting
- Inform the Fitter
- Close Job
Creating an Account
Tip: Accounts or Customers are the focus for the entire system. Jobs, Site Locations, Surveys, Quotes and Invoices all must be linked to an Account. An Account can be either a single person e.g. Mr Joe Bloggs or a company e.g Persimmon Homes
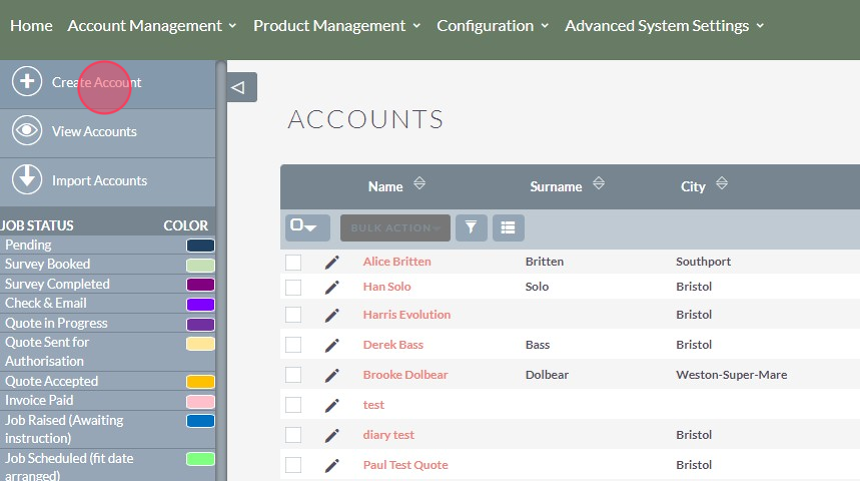
1. Click "Accounts"
2. To search to see if the Account already exists click this link the filter icon.

Tip: It is possible to search on multiple options to narrow your search. E.g. you can search on the Accounts surname and email address at the same time. NB: The search will only return matches where there is an exact match to both options.
3. Click here.
Tip: To set the search either scroll down to the search button or simply press Enter on the keyboard.
4. If the Account doesn't exist click Create Account
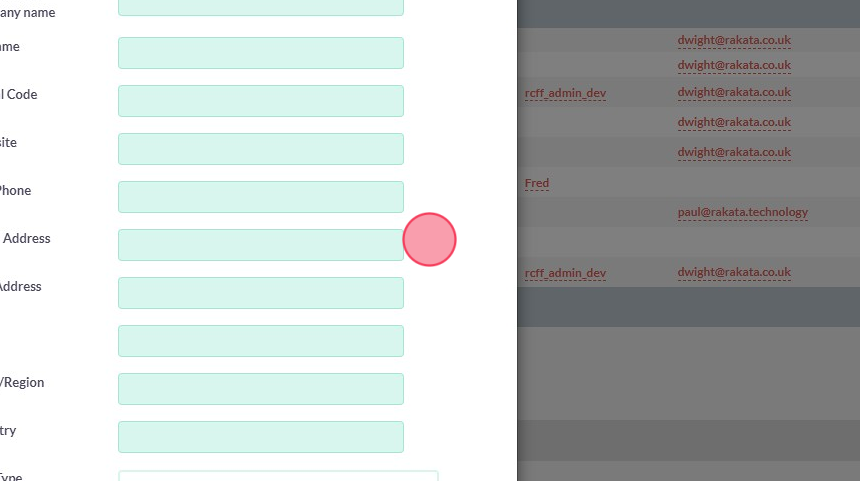
5. Add Account details.
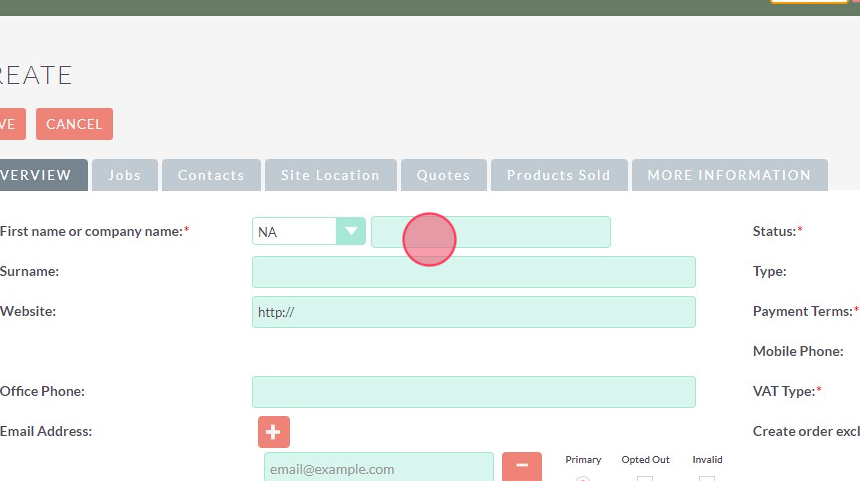
Tip: There are only 3 required fields to create an Account however the more detail the better the administrator experience.
6. Enter the Installation address of the 1st Job if required. If the job is within the UK we recommend using the Post Code lookup to search for the address.
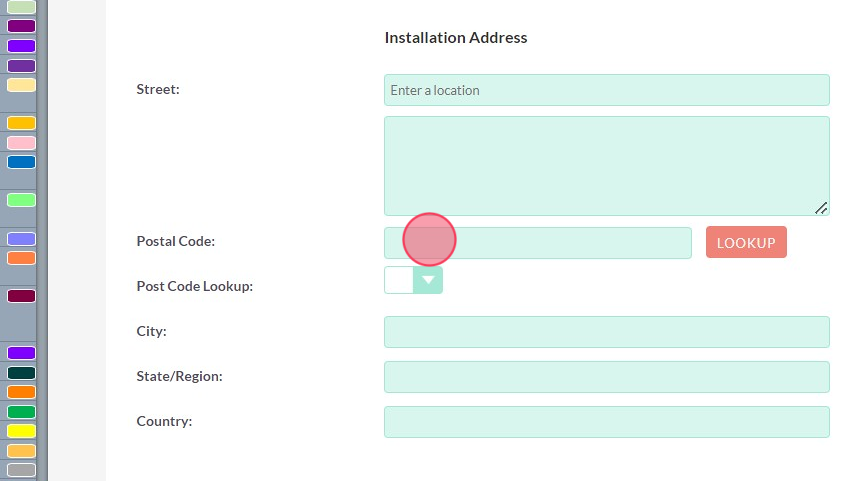
Tip: Tip! It is not necessary to add a installation address at this stage. For example if this was a corporate customer or landlord with multiple addresses you may leave this blank and then add specific installation locations when create jobs.
7. Add the Post Code and click this Lookup field.
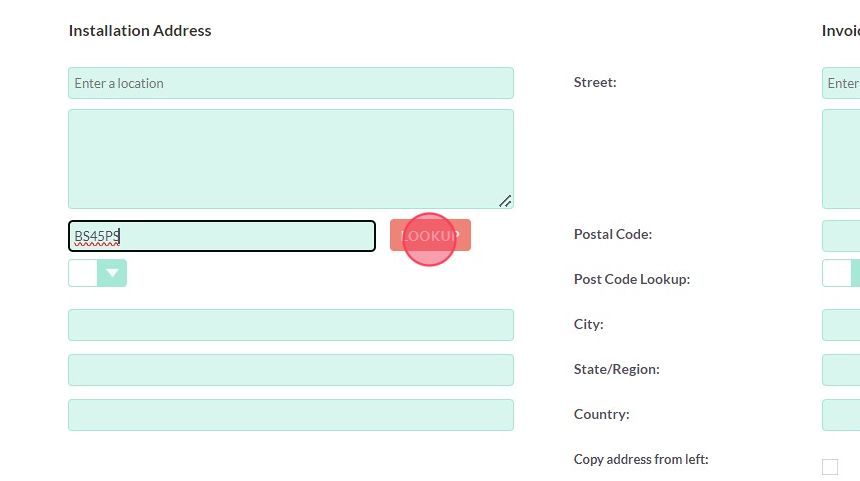
8. Search the List of Addresses based on the Post Code
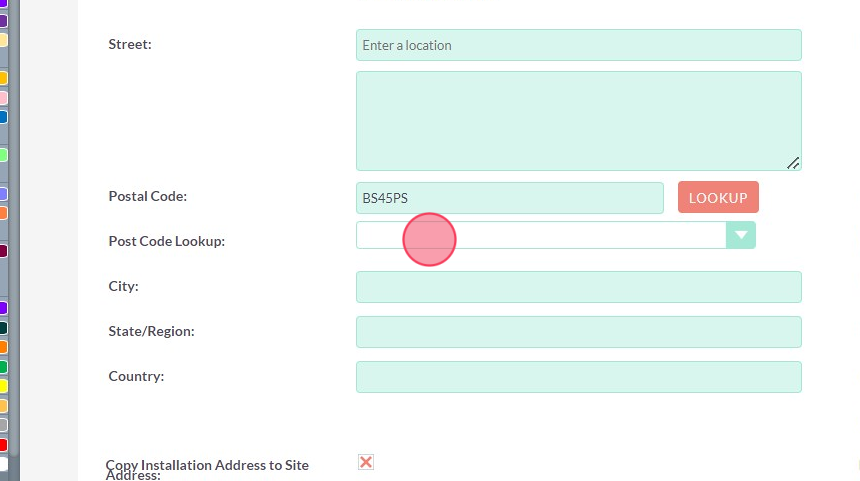
9. Click "State/Region:"
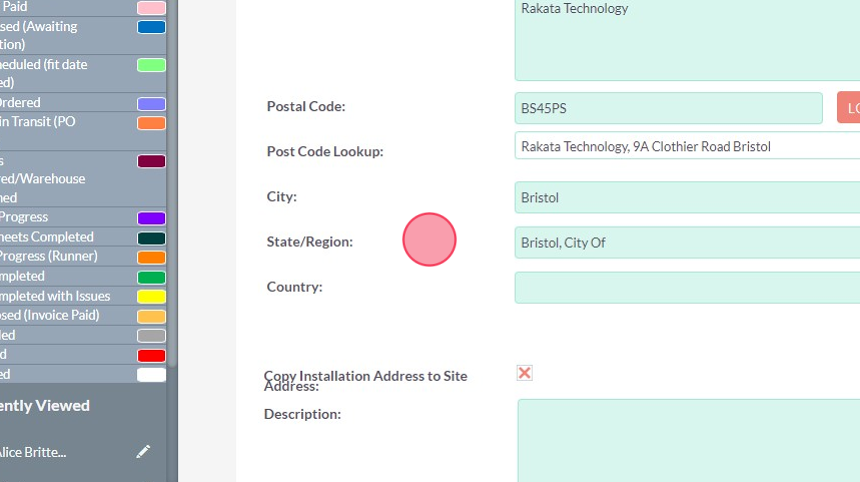
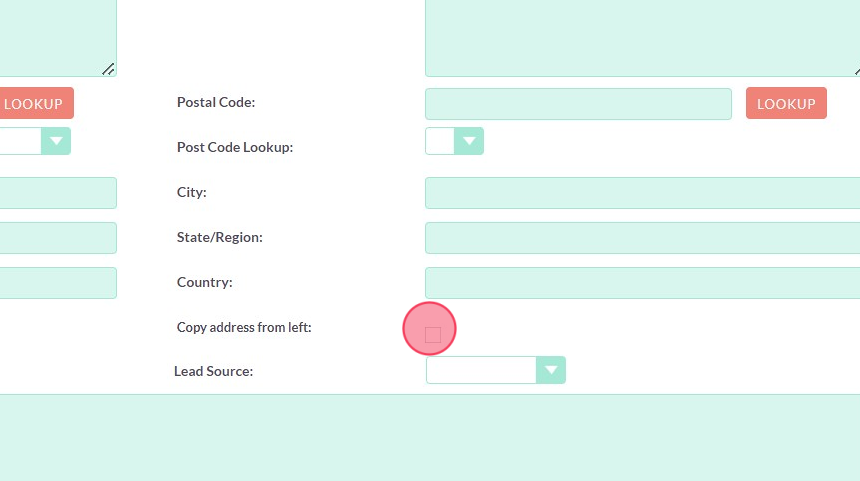
10. If the Installation address is also the Invoice address click the copy field to populate the invoice address.
11. Click this save button to create the Account
Alternatively, you can create a Job from the Kanban (“Walk In” or “On-Site Survey”)
1. Click "Jobs" button in the main header

2. Click the + Create Job Icon

Tip: Tip! There are two types of Job. Select the option most appropriate.
Walk In
A walk-In job is a job that will NOT require an on-site survey. This might be a customer who has all the information or simply a customer wanting to purchase carpet.
On-Site Survey
This is the normal approach where you take some details about the site and are arranging for a surveyor to visit to measure up.
3. Click "On-Site Survey"

4. The job will need to be related to an Account/Customer - to do this click on the link icon.

Tip! From here you can either relate the job to an existing Account or create a new account at this point.
Create a Job Survey/Order (Measure Up)
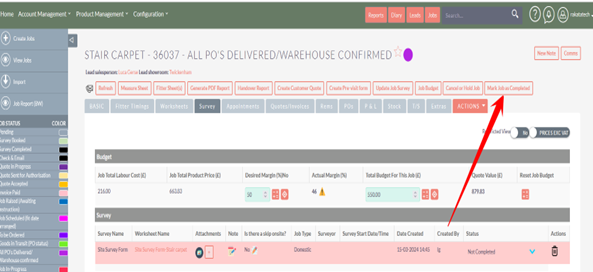
Within RakataCRM a Survey is a critical piece of the system. Every order, quote, fitting etc has to be based on a Survey. A Survey is where the Order is created and products/costs etc set.
Tip! The Word "Survey" can be renamed to a term more specific to your business. This can be found in Adavanced User Settings.
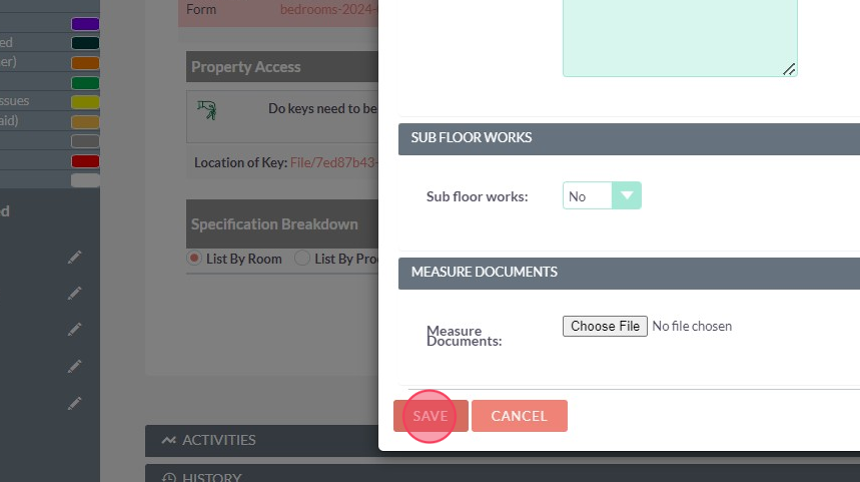
1. Click the "Create Job Survey" button

Tip! If you are visiting the site simply select No to the 1st option of "Is a Time/Date required?" which will create a Survey without any dates to visit.
2. Complete the booking form

3. Set the Survey to and from time

4. Select the Surveyor

Tip! Surveyors are users that are in the Surveyor role. To manage users go to Advanced Settings and set the user you wish to be available for booking as a surveyor and mark them as a surveyor
5. Add a specific notes for the survey to see when visiting the property

6. Choose to send the Customer and any related contact an SMS and Email regarding the survey booking.

Tip! As soon as the survey is saved the Email and SMS will be sent at this point.
7. Click "Submit" to create the survey appointment

8. To confirm the Survey has been booked click the Appointments tab

9. or view in the diary by clicking the Diary button and selecting the Diary of your choice.

Create the order (Adding rooms and products)
Rooms can be added in two ways.
1. The Surveyor can use the Android APP on site
2. The surveyor can take notes and return to this page and complete the survey.
This guide explores option 2.
1. Click "Add Room"

2. Select the room type

Tip! If you want to personalise the room name you can set the name e.g. Alice Bedroom
3. Set the dimensions of the room

4. If the requires a second cut you can add this here

5. The room creation will display both cuts

Tip! When adding products the system will create two products - one for each cut. This will compute the product and fitting cost for each cut automatically. You do NOT need to do any calculations.
6. Select the room specifics

7. Type " [[down]] [[down]] [[down]] [[down]] [[down]] [[down]]"
8. Room specifics are a good way to select typical products you would add to every room e.g. Grippers or underlay. You can add these here or later in the process.

9. Select the options (you can add more than one) per area.

10. Click Save - this will create the room with the products selected.
Adding Products
1. Click "ADD PRODUCT"

2. Type the Product you wish to select and click Search

3. Click select on your desired product
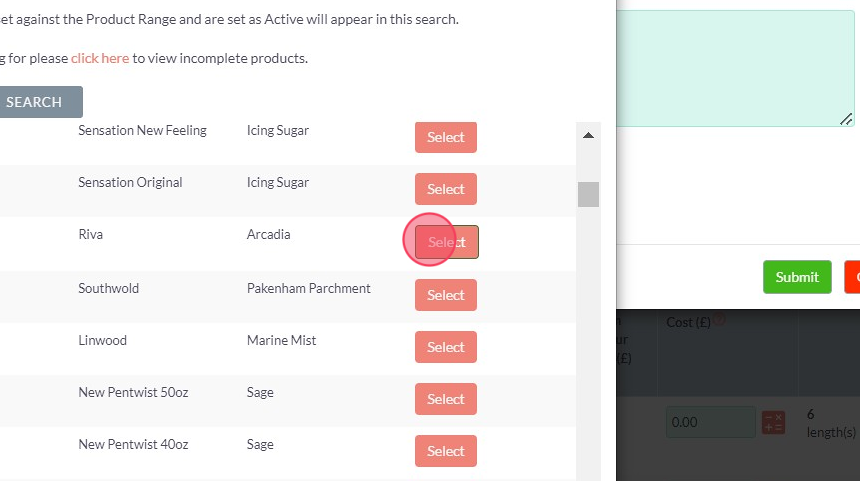
4. Click "Submit"

5. The system will automatically add the products to all the cuts within the room as well as automatically calculate the product and fitting cost based on the room dimensions. The system will also calculate to the the product quantity/dimensions for the selected product.

Tip! You can update any aspect of the Product once it is set. For example if the system calculates 10 grippers but you know you can complete the job with 8 grippers you can click the edit button and override the quantity to 3 grippers.
6. The system will calculate the total room price. You can override this price to be anything you want. For example if the price was £346.02 but you wanted the price for be £330.00 add this value and click the calculate button. The system will adjust all product prices BUT NOT the labour cost.

7. The calculate button will update the cost of room.

Adjusting the order price (Price to win)
1. At the top of the page you can the total quote value.
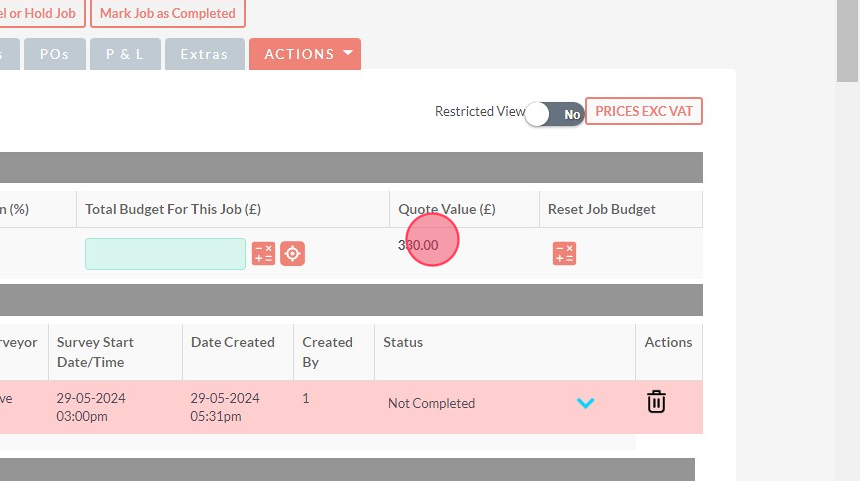
2. If you want to get the price to a certain value you can simply input the price (price to win) number and click the calculate button. This will update all the Product cost (NOT the labour) cost for every product evenly and ensure the quote value gets to the price you want.

3. In this example - adding 300.00 and clicking the calculate button.

4. Will adjust the entire order to meet your price desires.

** Tip! There may be instances where it is not possible to simply adjust the entire room in one go. You can however adjust either an entire room or any product or service individually **
Create the Quote > Send the quote > acknowledge the quote!
1. Click the "Create Customer Quote" button.

Tip! The system allows you to create different quotes based on rooms. For example a customer might want a quote for the downstairs and a separate quote for the upstairs.
2. Select the rooms you want to create the quote

3. View the PDF quote by clicking the PDF ICON

4. Any specific quote text you want to add can be added here

5. Add the customer specific quote notes that will be appended to the quote

6. Set the paremeters you want the customer to accept the quote.
TIP: RakataCRM for Flooring is integrated to BLINK and Square Payments. Please contact Rakata to discuss this setup and integration. There is no additional cost from Rakata to use these tools however there may be costs associated from the payment provider.
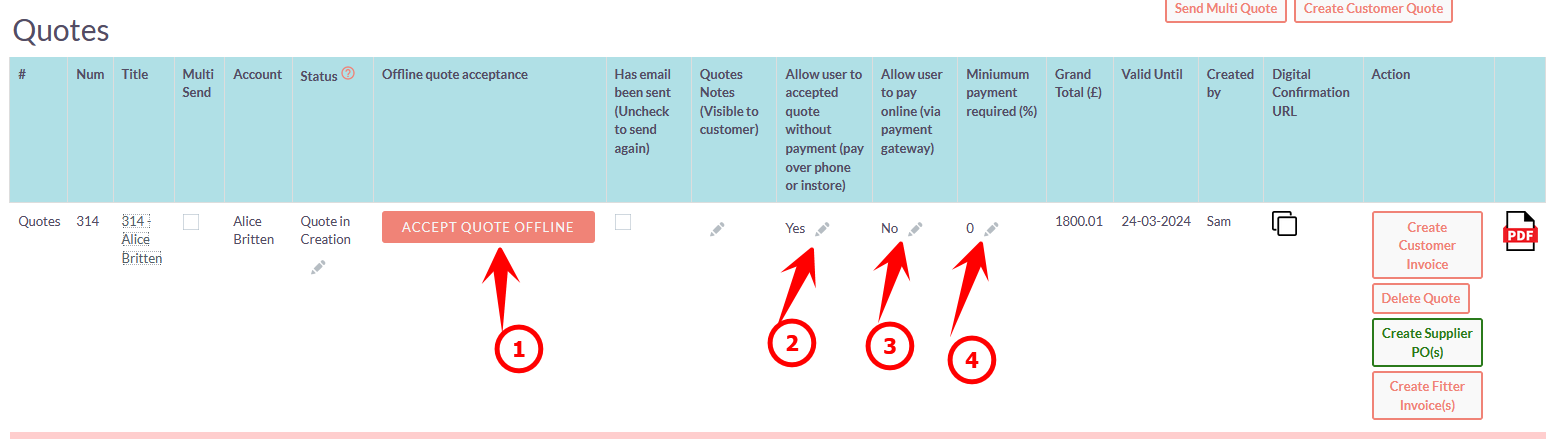
There are a 4 options that a customer can accept a quote:
- If you are happy to accept the quote offline (e.g. they call you or email you click the "Accept Quote Offline" button".
- If you allow them to accept the quote via a link and NOT pay - set this to YES
- If you want to give them the option to pay online (Assuming it is setup) click YES
- Set the % amount of the quote you are prepared to accept as a deposit.
TIP: If option 4 is set the system will always provide the customer with the option to pay in full as an additional option to paying the minimum deposit amount.
7. Send the quote for the customer to sign

8. Click "Submit"

Tip! If the person who creates the quote is NOT the Sales Person they can select Check and Email. This will send an email to the Sales Person that a quote is waiting for review. The Sales Person can then review the quote and send from themselves.
Customer Quote Acceptance
1. The customer will receive and Email and SMS with the quote details to complete

Tip! It is possible to embed the Quote Acceptance link directly within the Email. This is configurable based on your preferences.
2. The customer can open and click the link to accept the quote

3. Clicking the link will open a customised customer acceptance page

Tip! This page is branded with your logo and company colours. The acceptance quote text and confirmation text are configurable by your system administrator.
4. The customer will be requested to complete all the required fields.

5. Click "CONFIRM QUOTE"

Tip! If you accept online payments and this is configured you can set a minimum online payment to accept the quote e.g. 50%. The customer will always have the option to pay the full amount. If you have set configured the option to confirm quote and pay in the showroom the customer will have this option. These options are configurable at the quote sending stage.
Book a Fitting
Once a quote has been accepted the salesperson will automatically receive an email to confirm this.
The job status will automatically update to “Job Raised Awaiting Instruction”

Once you have arranged a date with the customer for a ‘Fit Date’ you can book this.
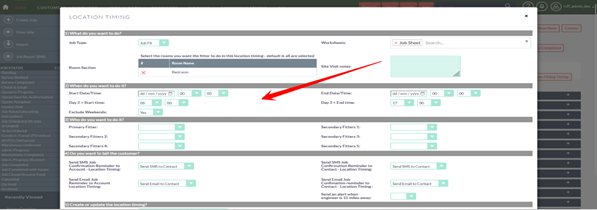
Job > Fitter Timings > Create Fitting Timing
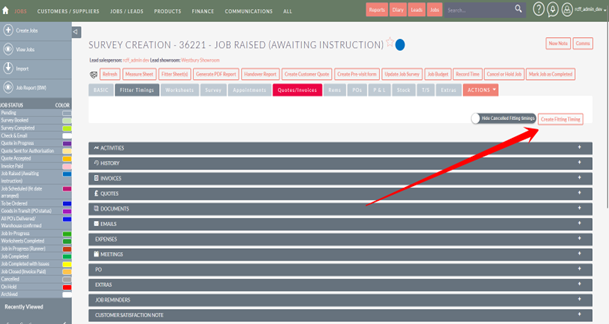
Complete the fitter timing criteria
Inform the Fitter
There are 3 methods for the fitter to be informed of the job timings and details. These are:
- The Fitter uses the Android App and logs in to see their upcoming schedule.
- Fitter logs into the simple fitter website to see the basic details and download the fitter sheet PDF onto their phone – The website for the fitter to view is: https://<<YOUR_CRM_DOMAIN>>/Fitterweb

3. salesperson downloads the Job Fitter sheets from the job record.
Close Job
Once a job is completed you can make the job as completed with notes. After 14 days this job is then automatically updated to Archived.