Customer & Job Management
There are many different ways to accomplish tasks with the CRM. This quick guide illustrates a simple logical flow. As you get more familiar with the system you may use better flows that work for you.
The following guide provides details based on the following flow:
- Create Account
- Create a Job
- Create a Survey (if required)
- Quote Job
- Send for quote for Signature
- Booking an Engineer (Location Timing)
- Reviewing the diary
- Managing Job Time Events & Jobsheets
- Job Completion and Invoicing
- Syncing with the Finance System
- Timesheet review
- Exporting Payroll
Create Account
The Account or Customer record is where all details of that Account are held. This will include contact details, related Job, Quotes and Invoices.
To create an Account goto CRM > Accounts
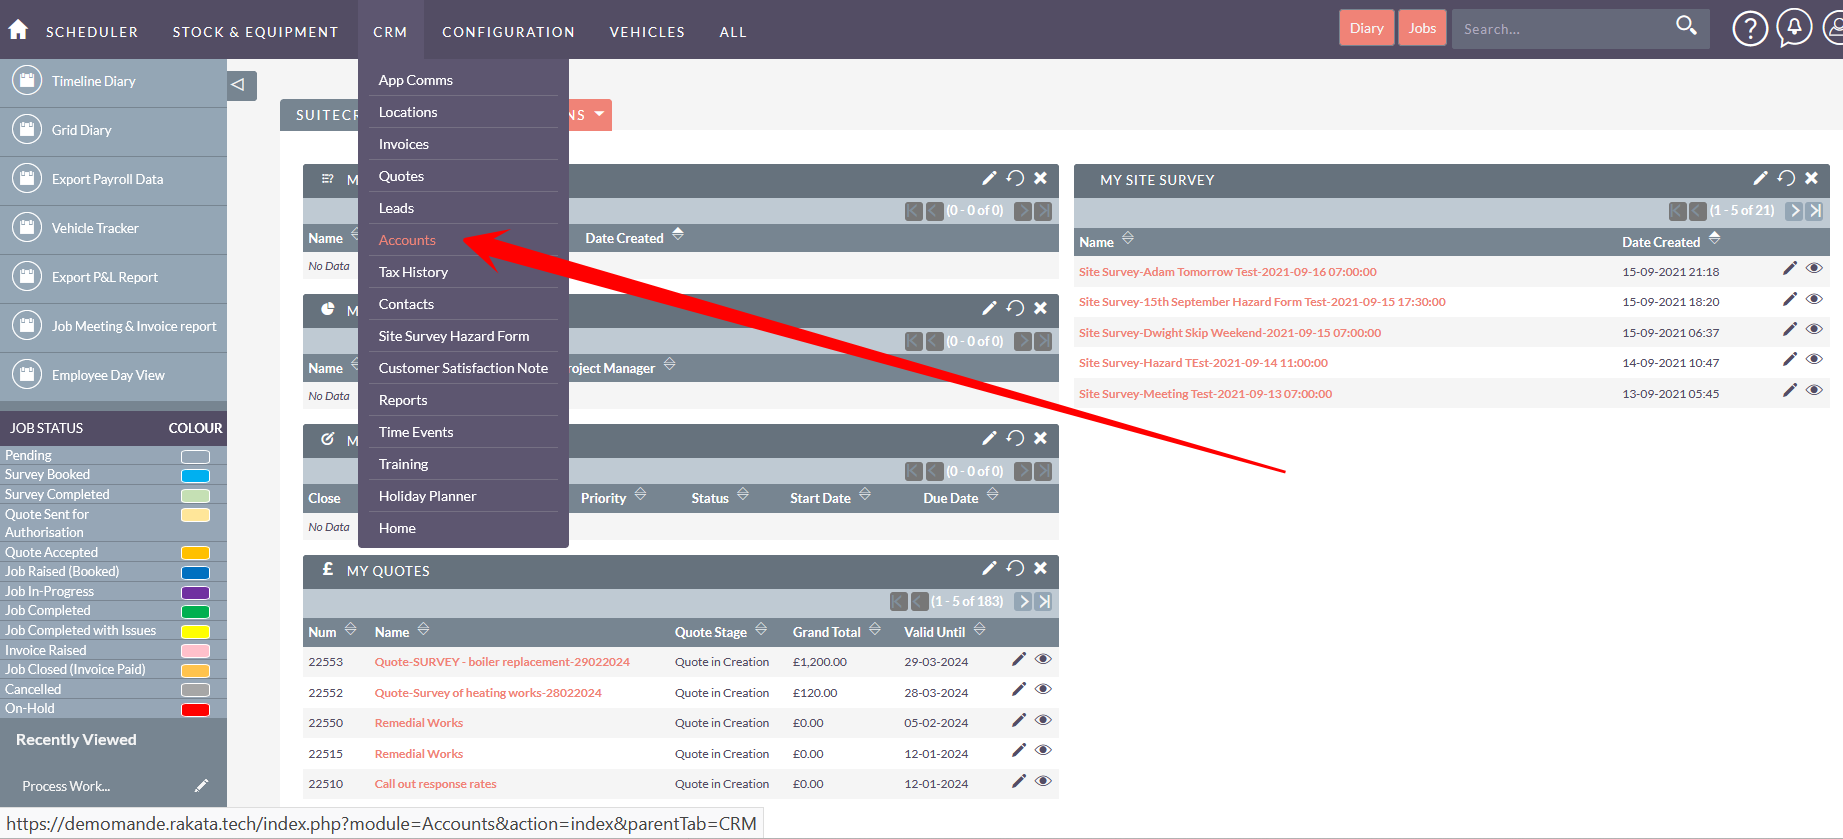
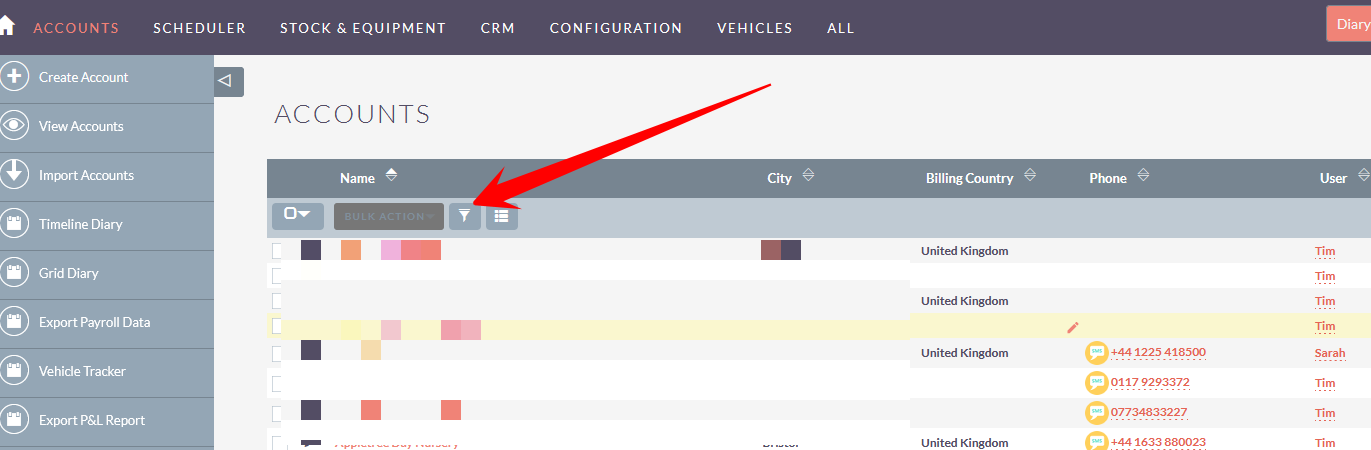
From the Account List view you can create a new account (1) or view existing accounts (2)

Tip: You can easily search for Account by clicking the Search icon
Creating an Account
There are very few required fields to create an Account.
Tip: For addresses simply add the full postcode and click search and this system will return address to that postcode to simply add.

Save the Account
See Next > Create Job
Create a Job
There are a number of ways to create a job. This method views the Account first. We recommend this so you can see details of the Account before creating a new job. For example does the Account already have jobs not completed, are they on stop etc.
From the Accounts page click the Jobs Tab
TIP: If this job will be at a new site location with specific contacts to the Site Location you can click on the Site Location tab and Contacts tab and add these here. You can also do this when creating a job depending on your preference.
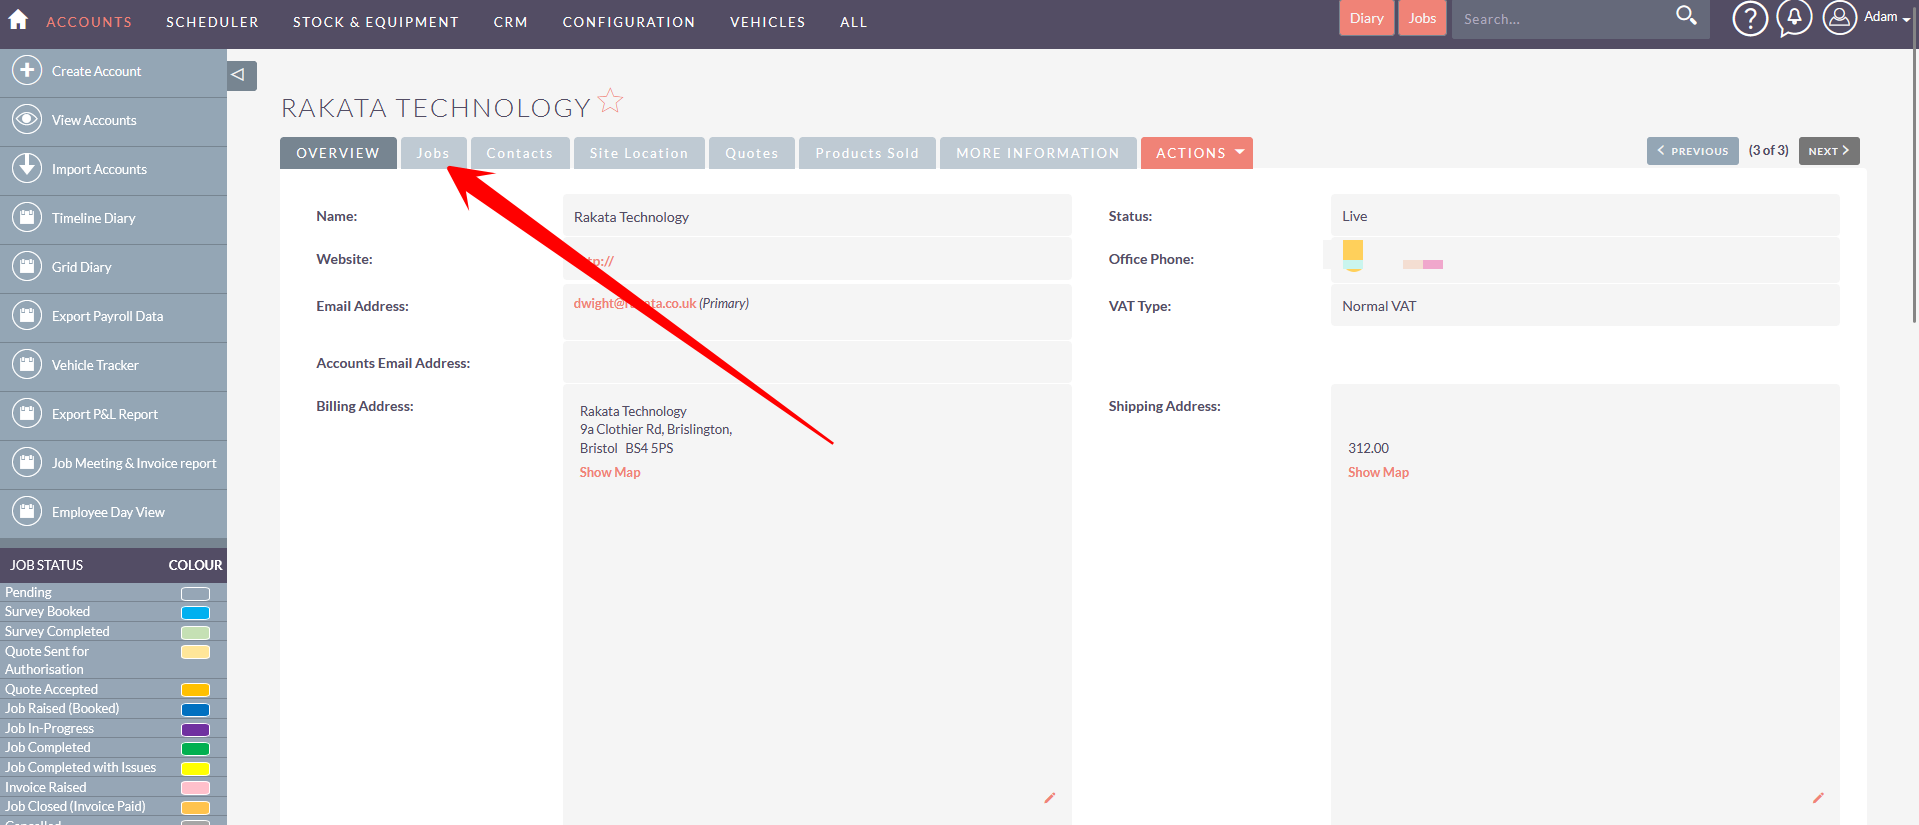
This will list all the jobs for that Account.
You can view the basic details of the job including the status.
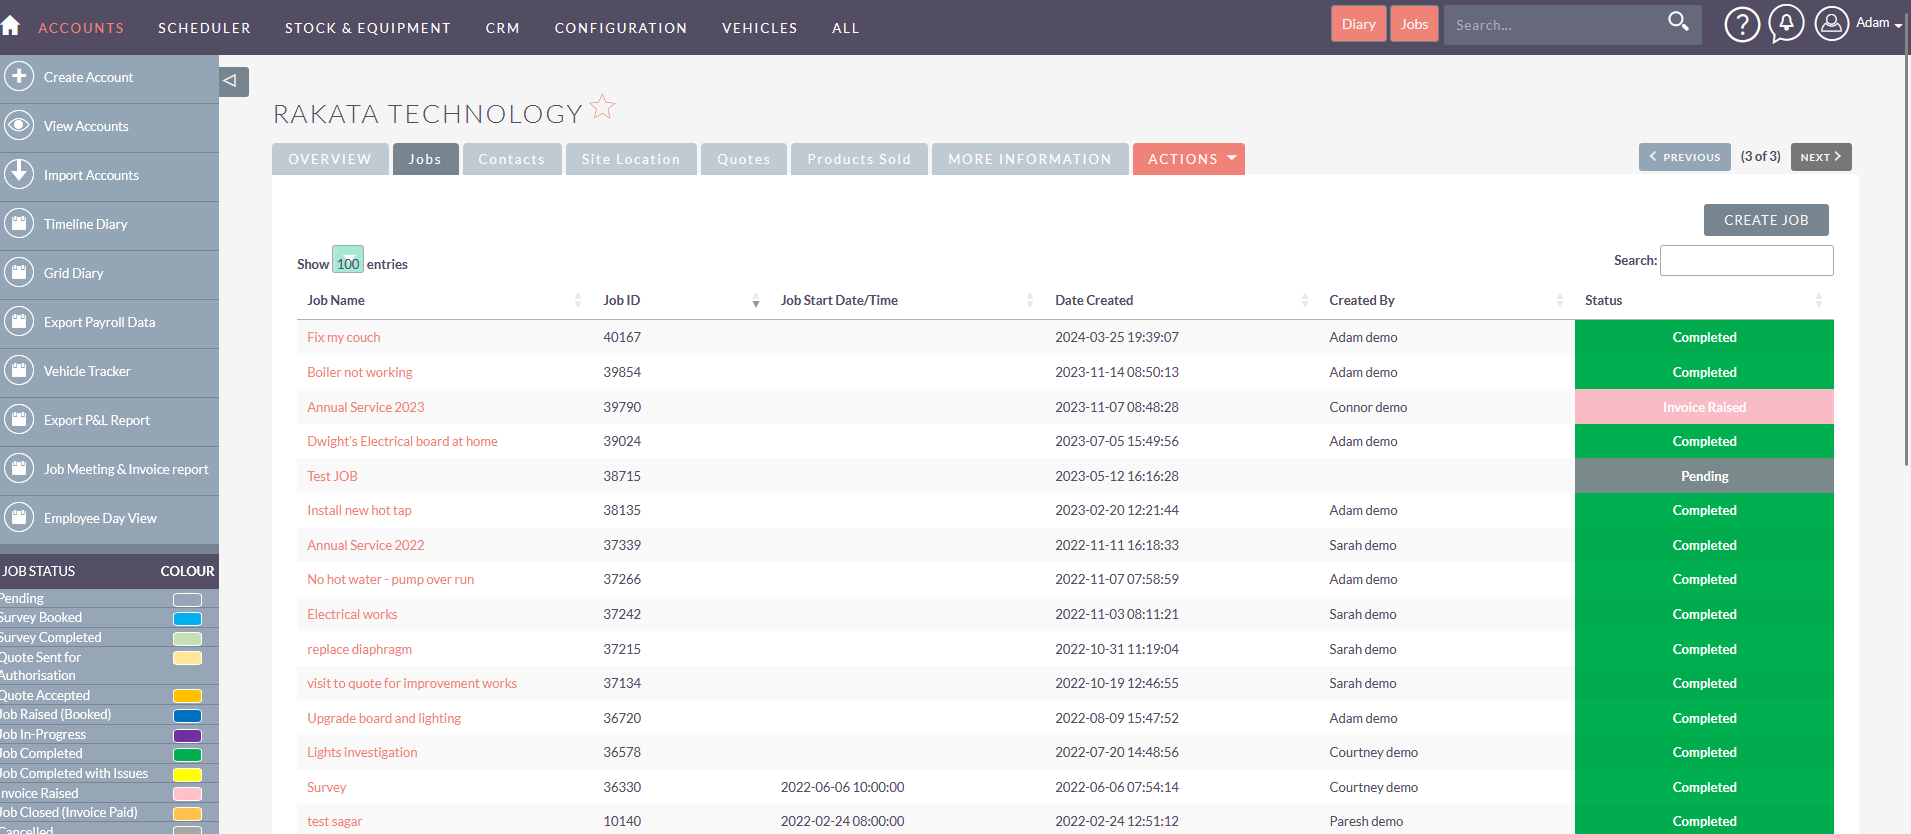
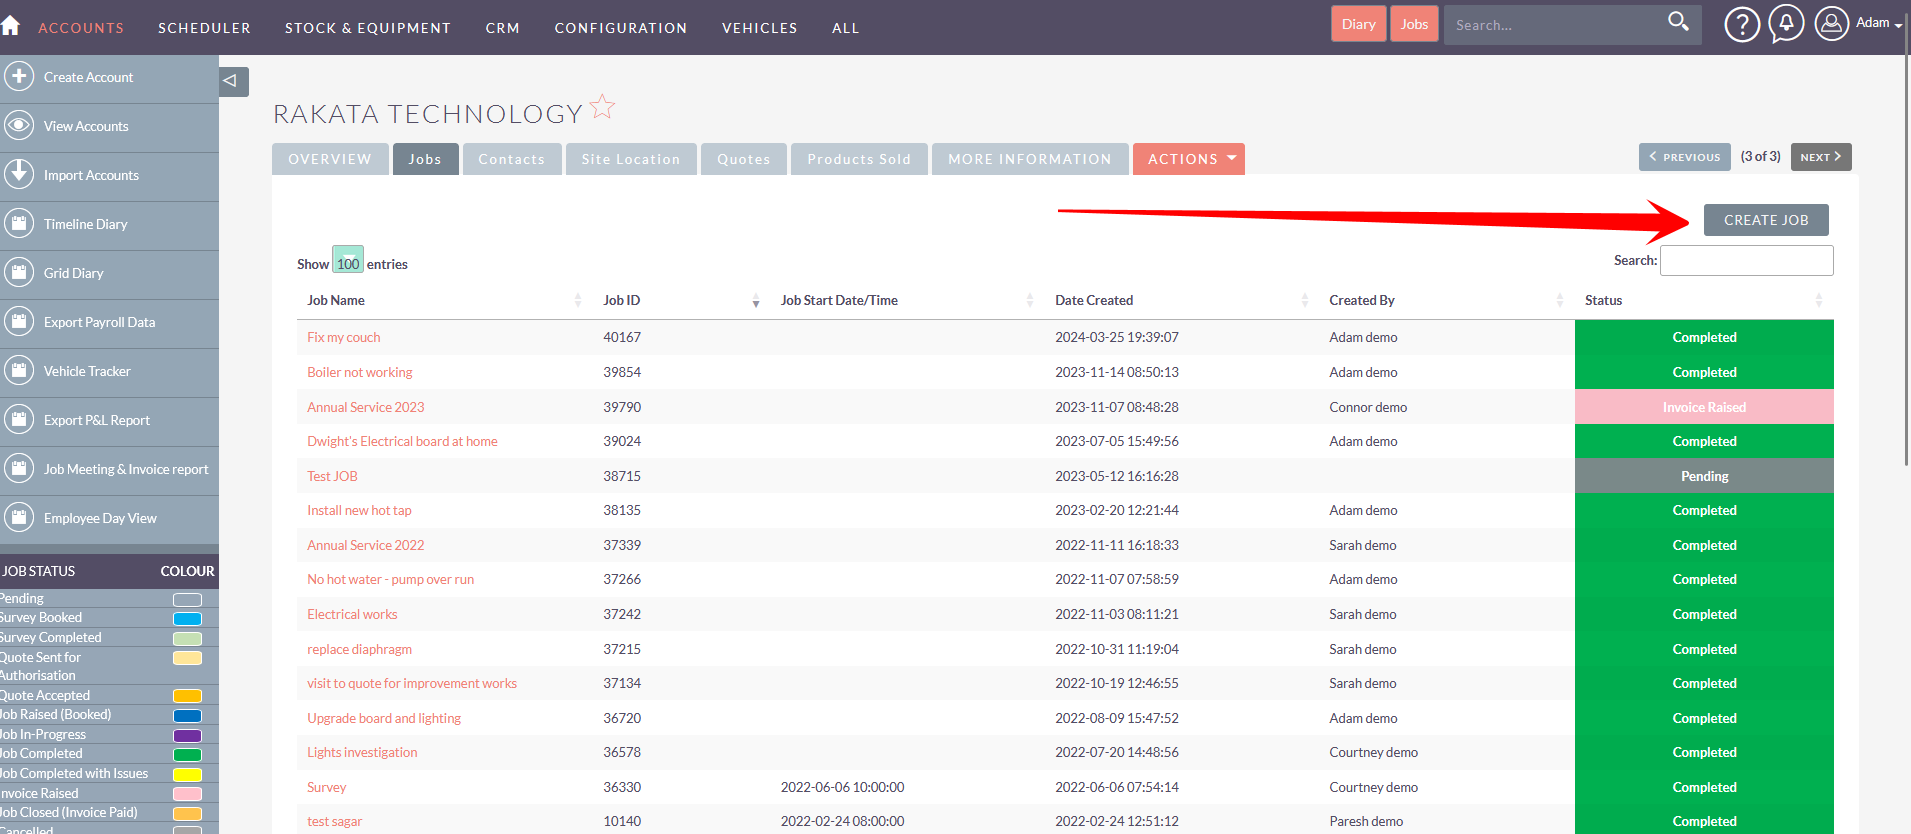
Click the Create Job button to create a new job
When creating the job from the Account record the Job will automatically set the Account
The Job will also filter Site Locations against this job. If the site location is NOT set or this is a new site location you can add a new site at this point.
TIP: All jobs must have a site location. For some customers that might only ever be one site location which is the same as the Account address. But for larger customers you might have many site locations against the one account. There is NO limit to the number of site locations you have or related contacts to that site location.
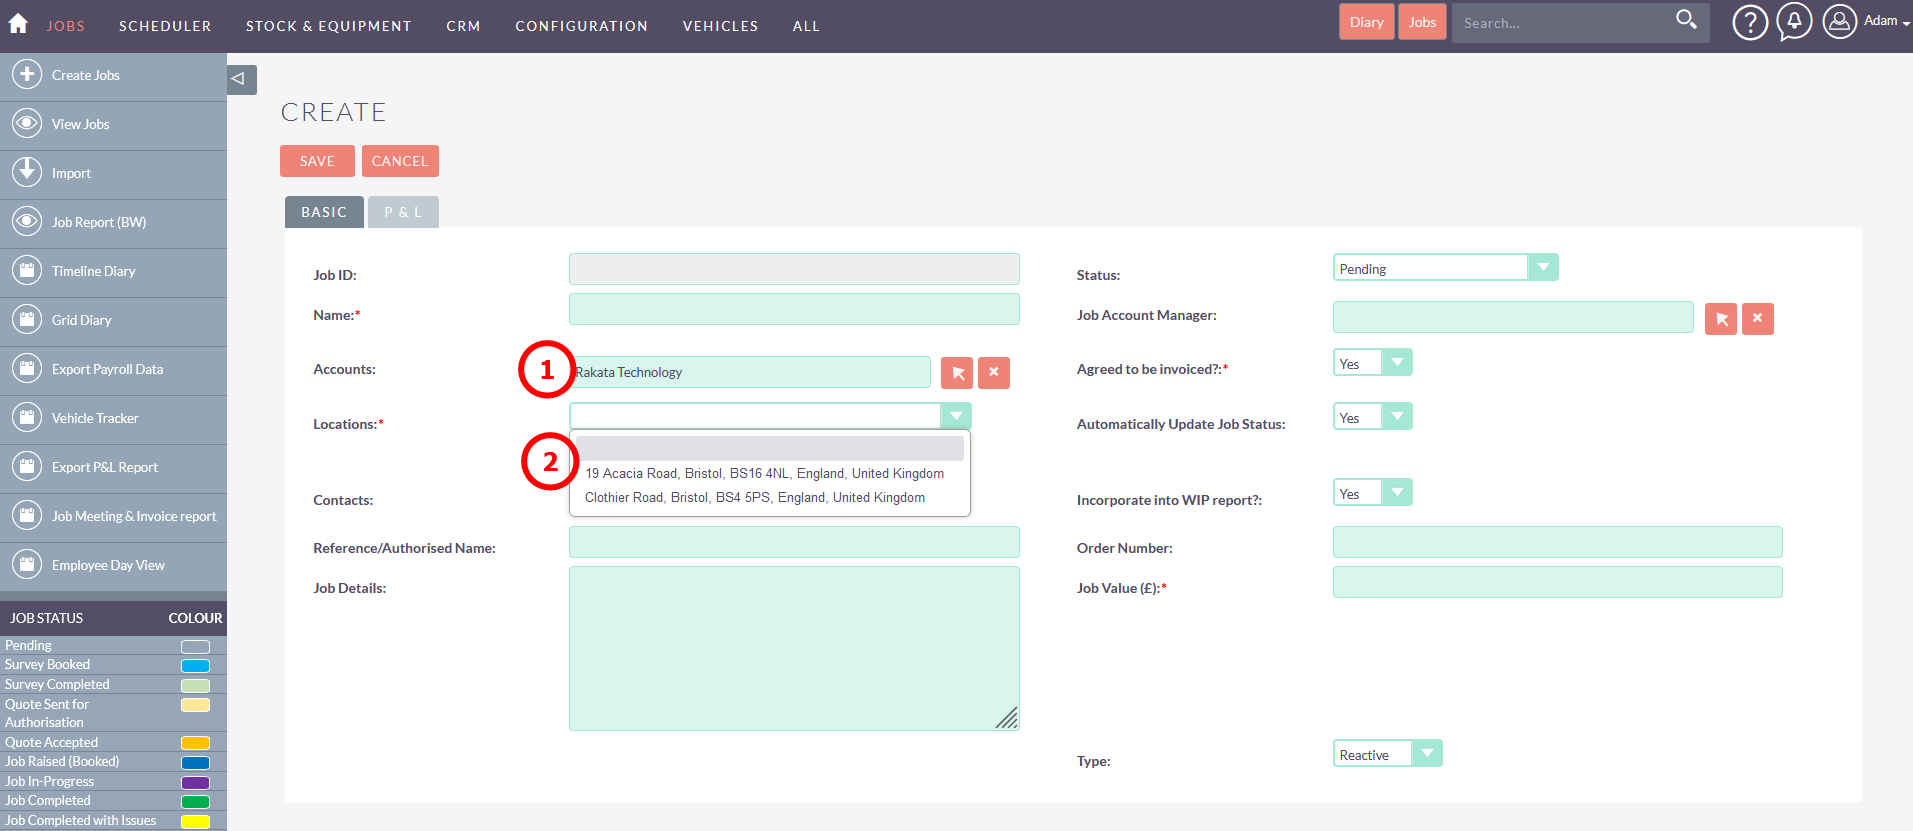
Complete the Job details are requried.
Next > Book a Survey
Create a Survey (if required)
If a Site Survey is required you can set this in the Job Survey section
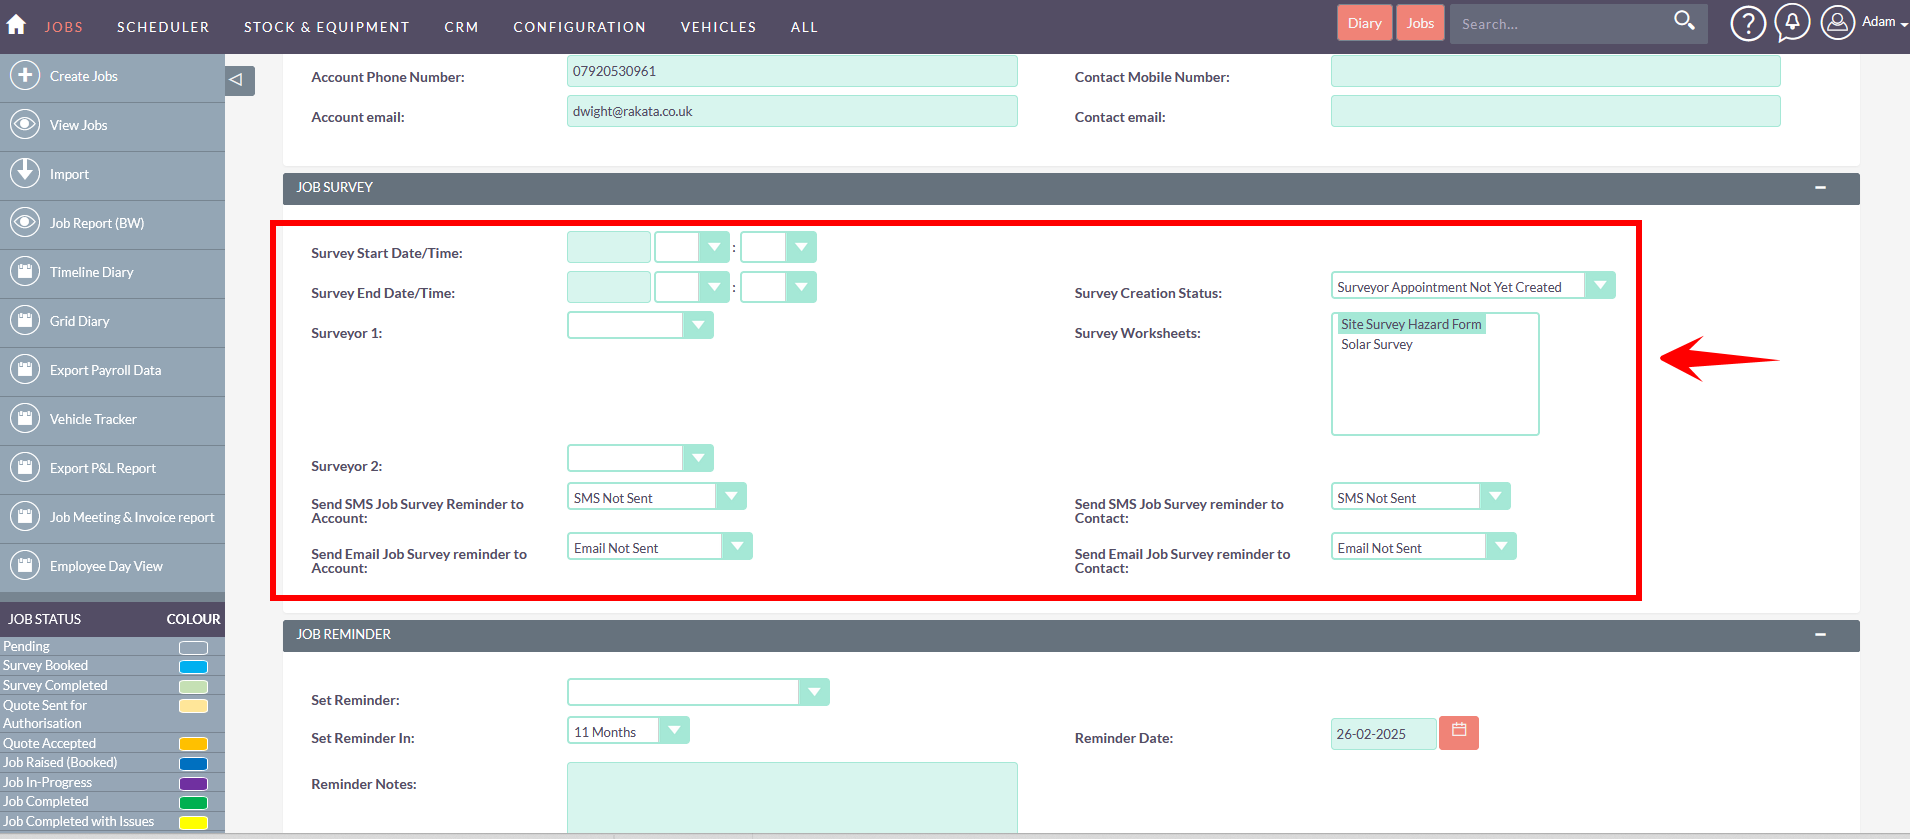
TIP: Remember to set the drop to Survey Creation Status to "Create Surveyor Calendar Entry" in order to create the Survey. If this is NOT set to Create Survey Celendar Entry to Survey record and appointment will NOT be created.
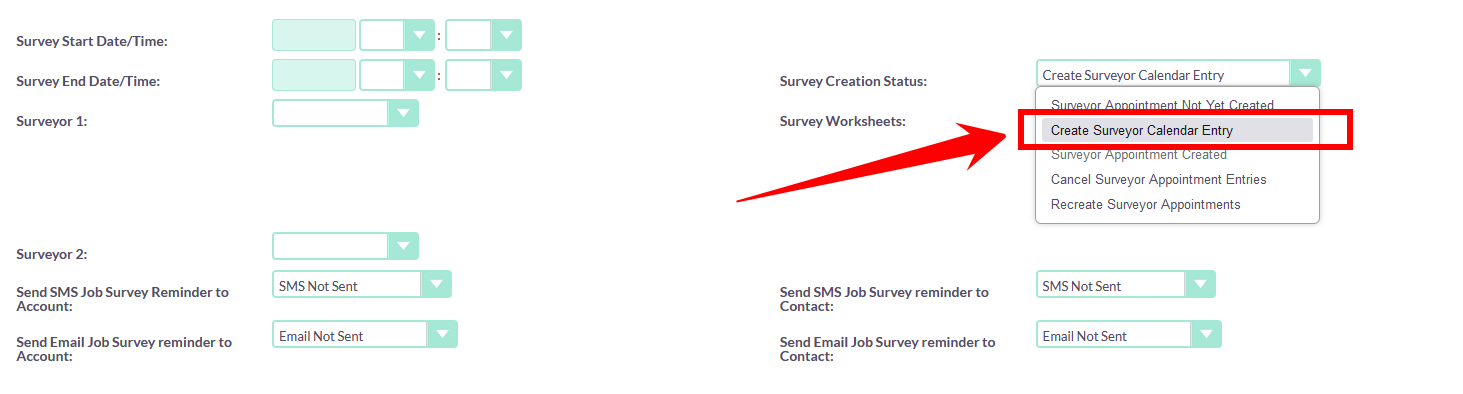
TIP: If Office 365 Email Integration is setup and part of your package this will create a calendar entry in the users diary at this point.
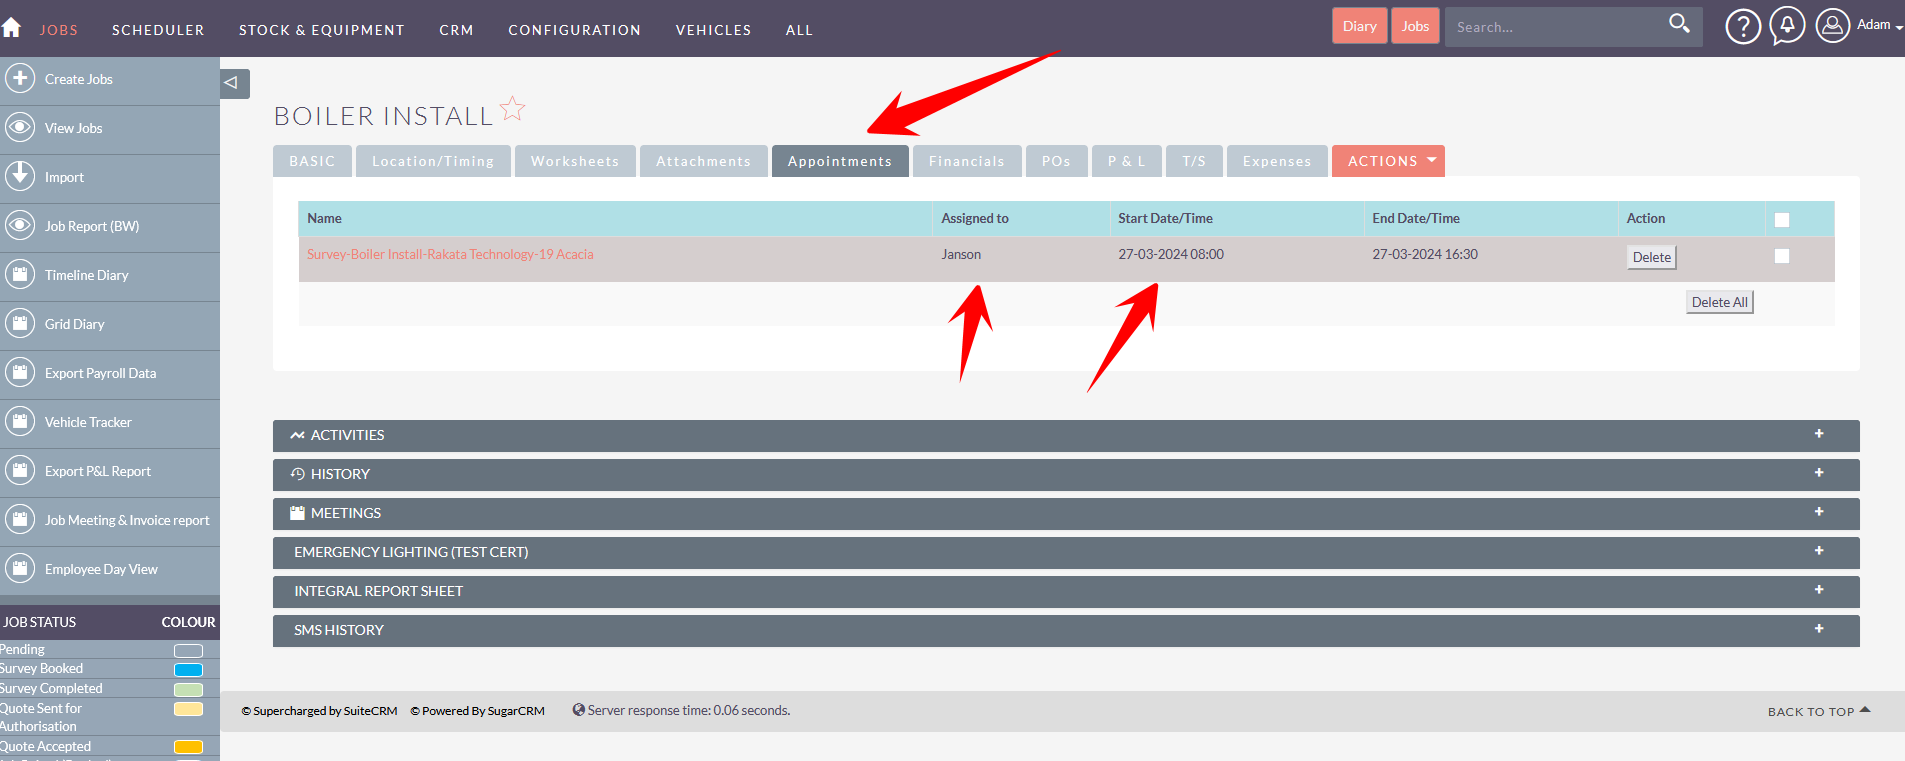
You can check if the Appointment has been created by clicking on the Appointments tab and see the appointment record.
Quote Job
If you are quoting the job (e.g. once completing the survey) prior to starting the job then the would create the quote from within the job record.
- Financial Tab
- Create Quote
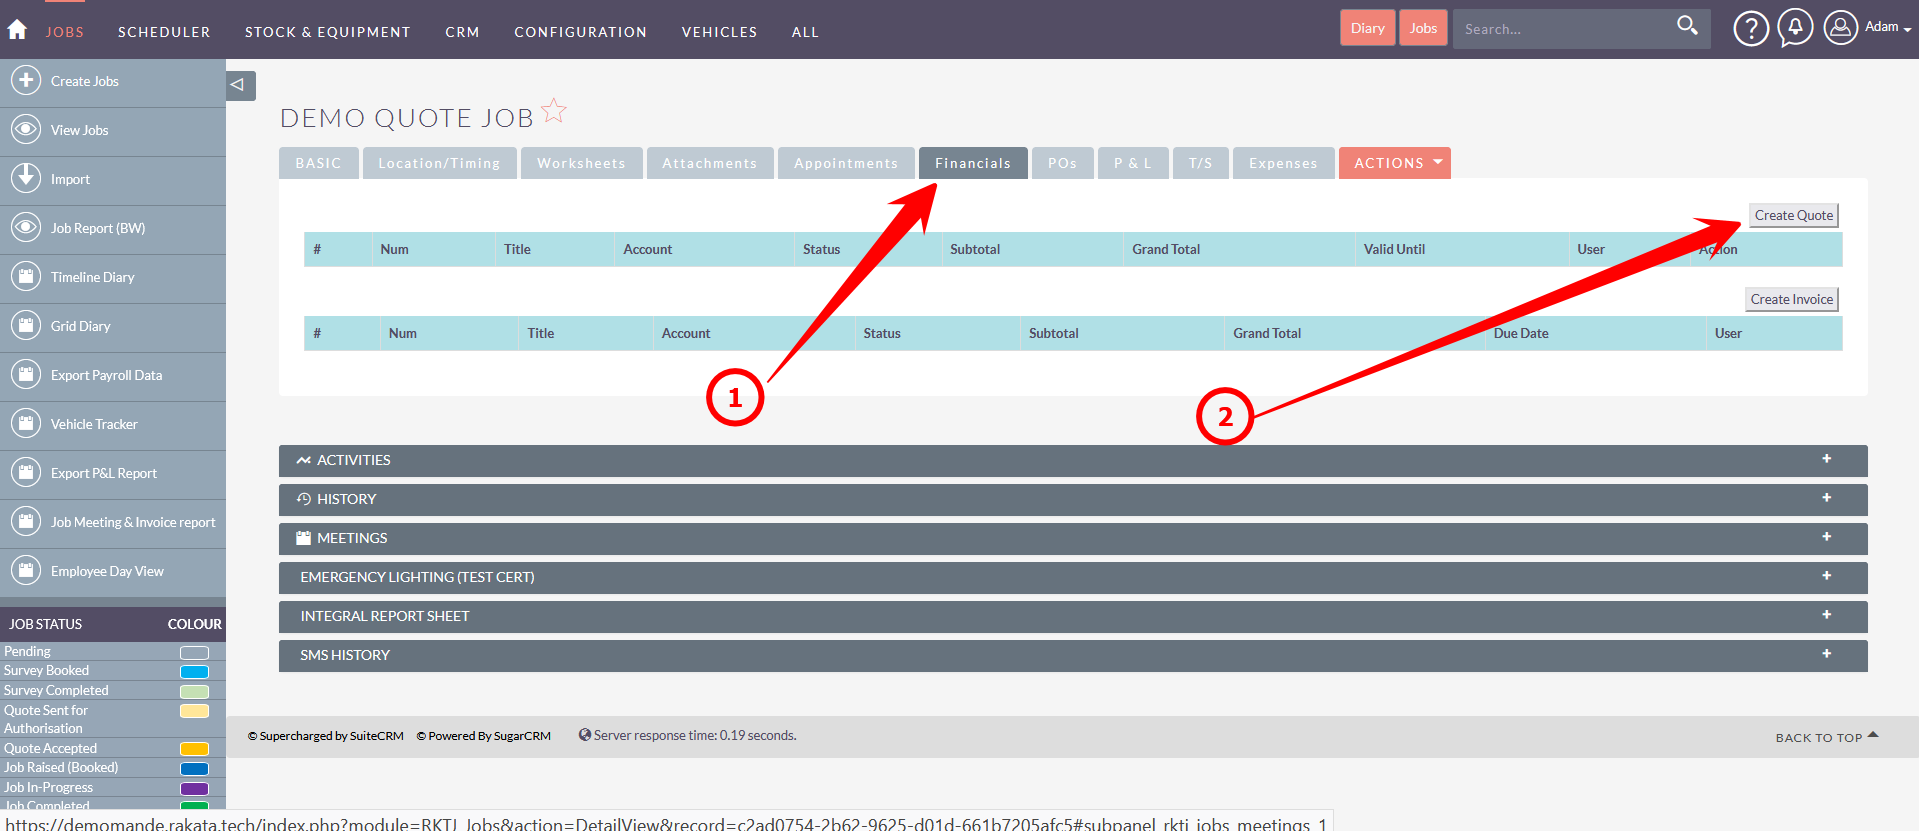
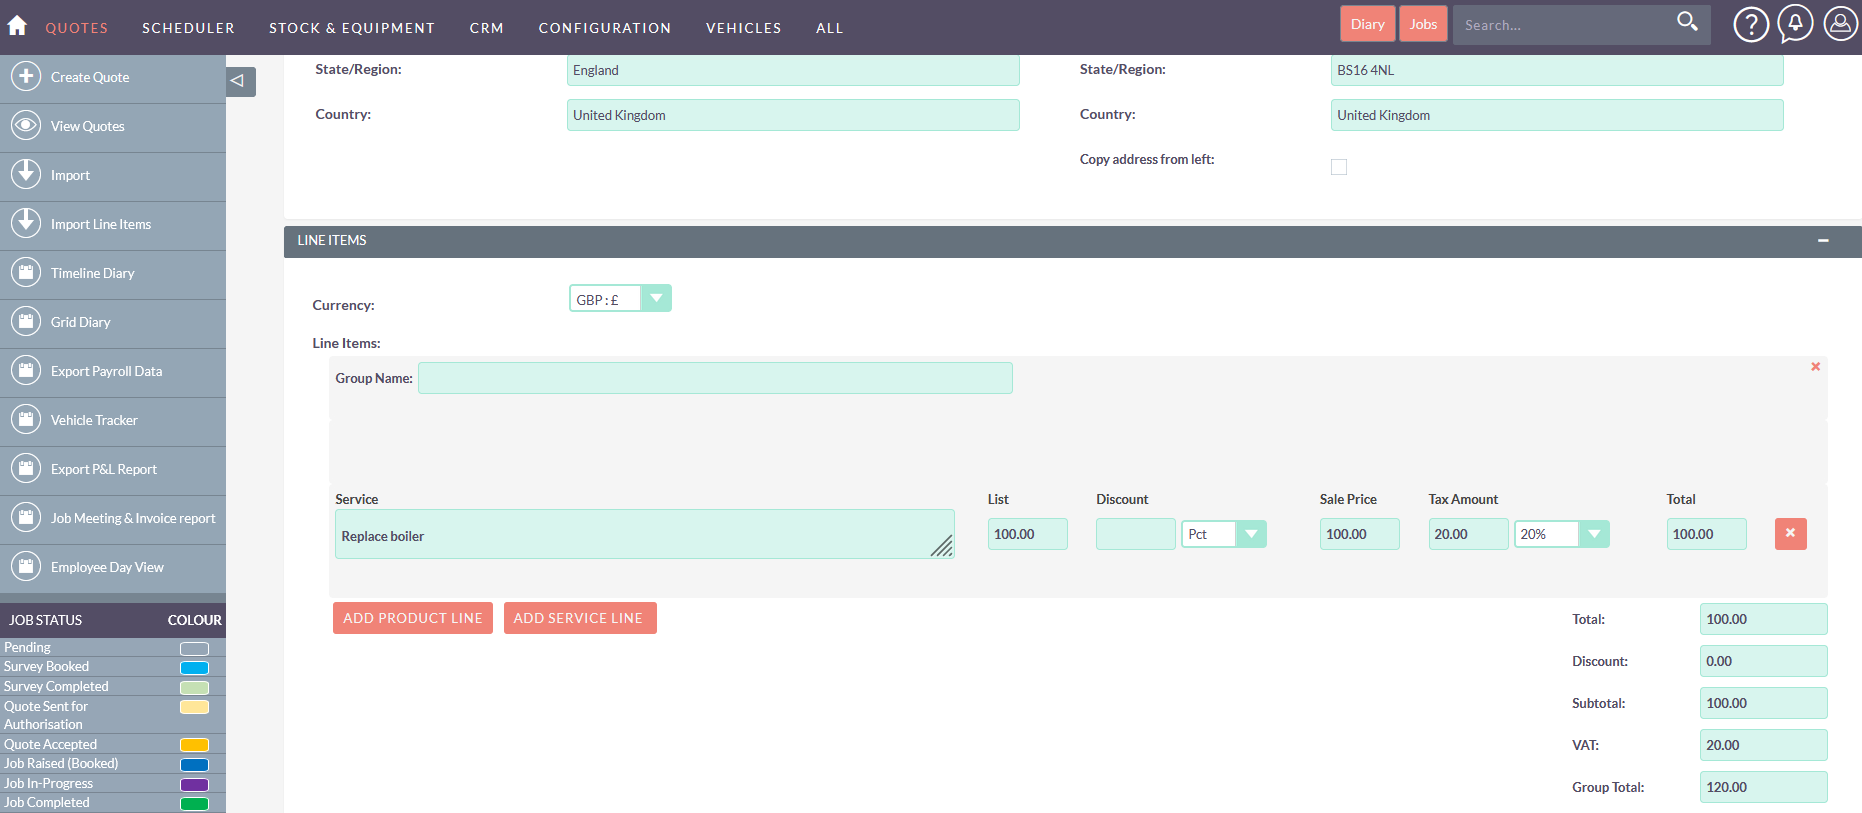
Generate the quote and all details required to send to the customer
Send for quote for Signature
There are a number of ways to send a quote for a customer to sign. These are:
- Print and send
- Download the PDF and send in an email
- Send for an digital signature
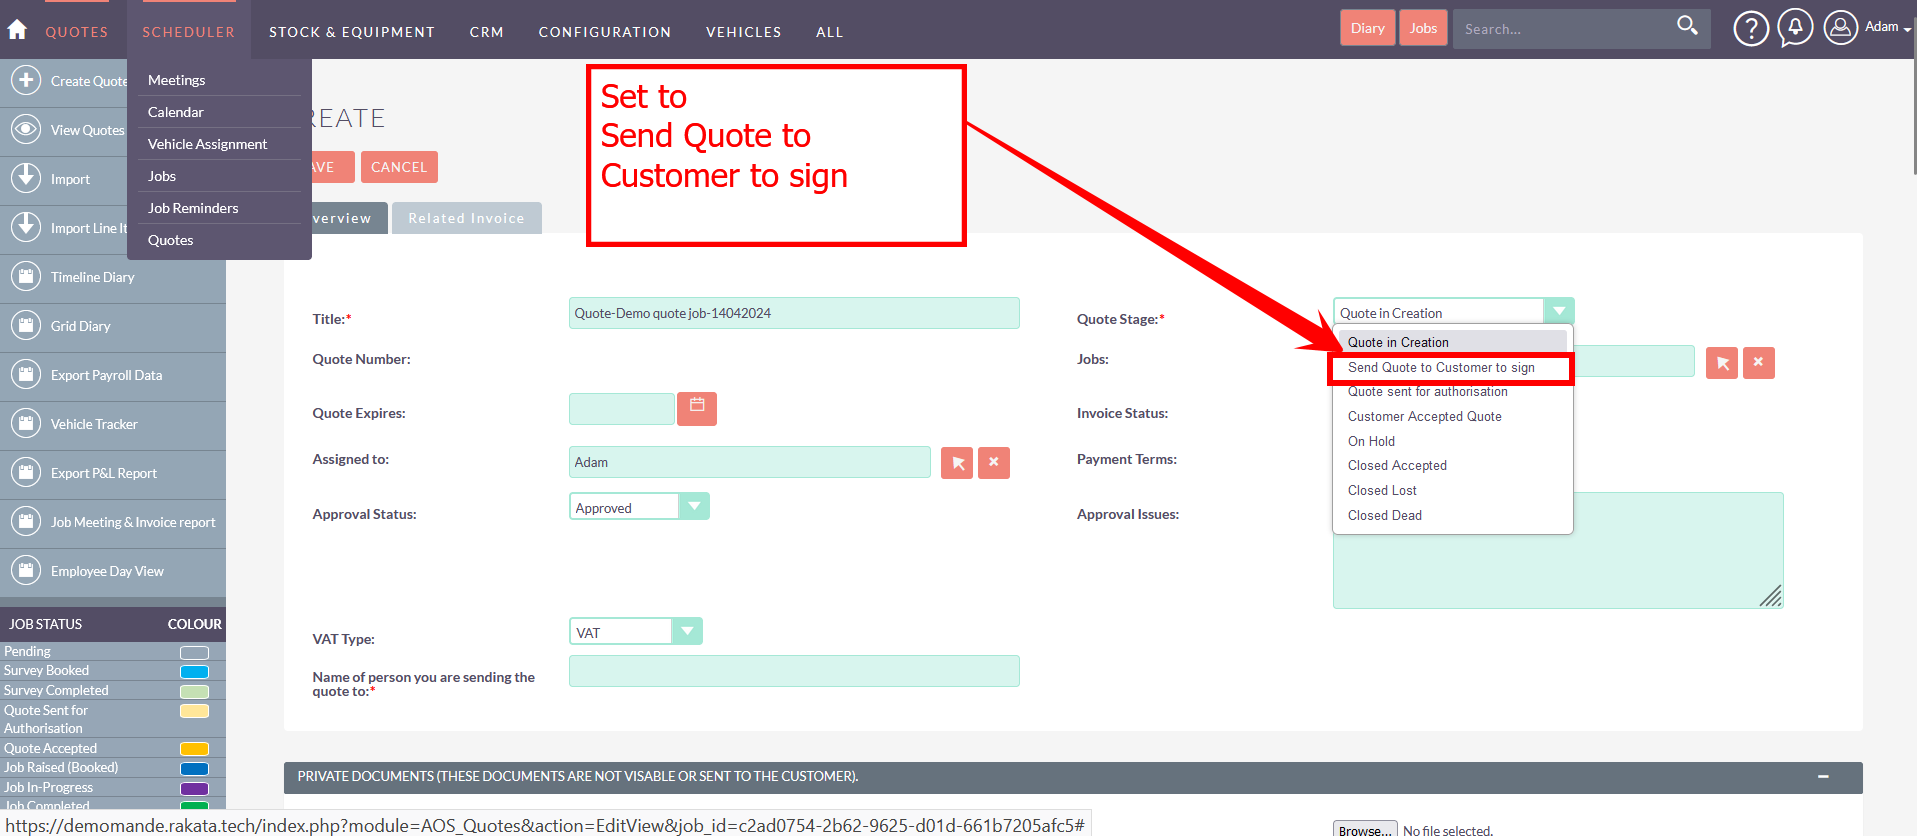
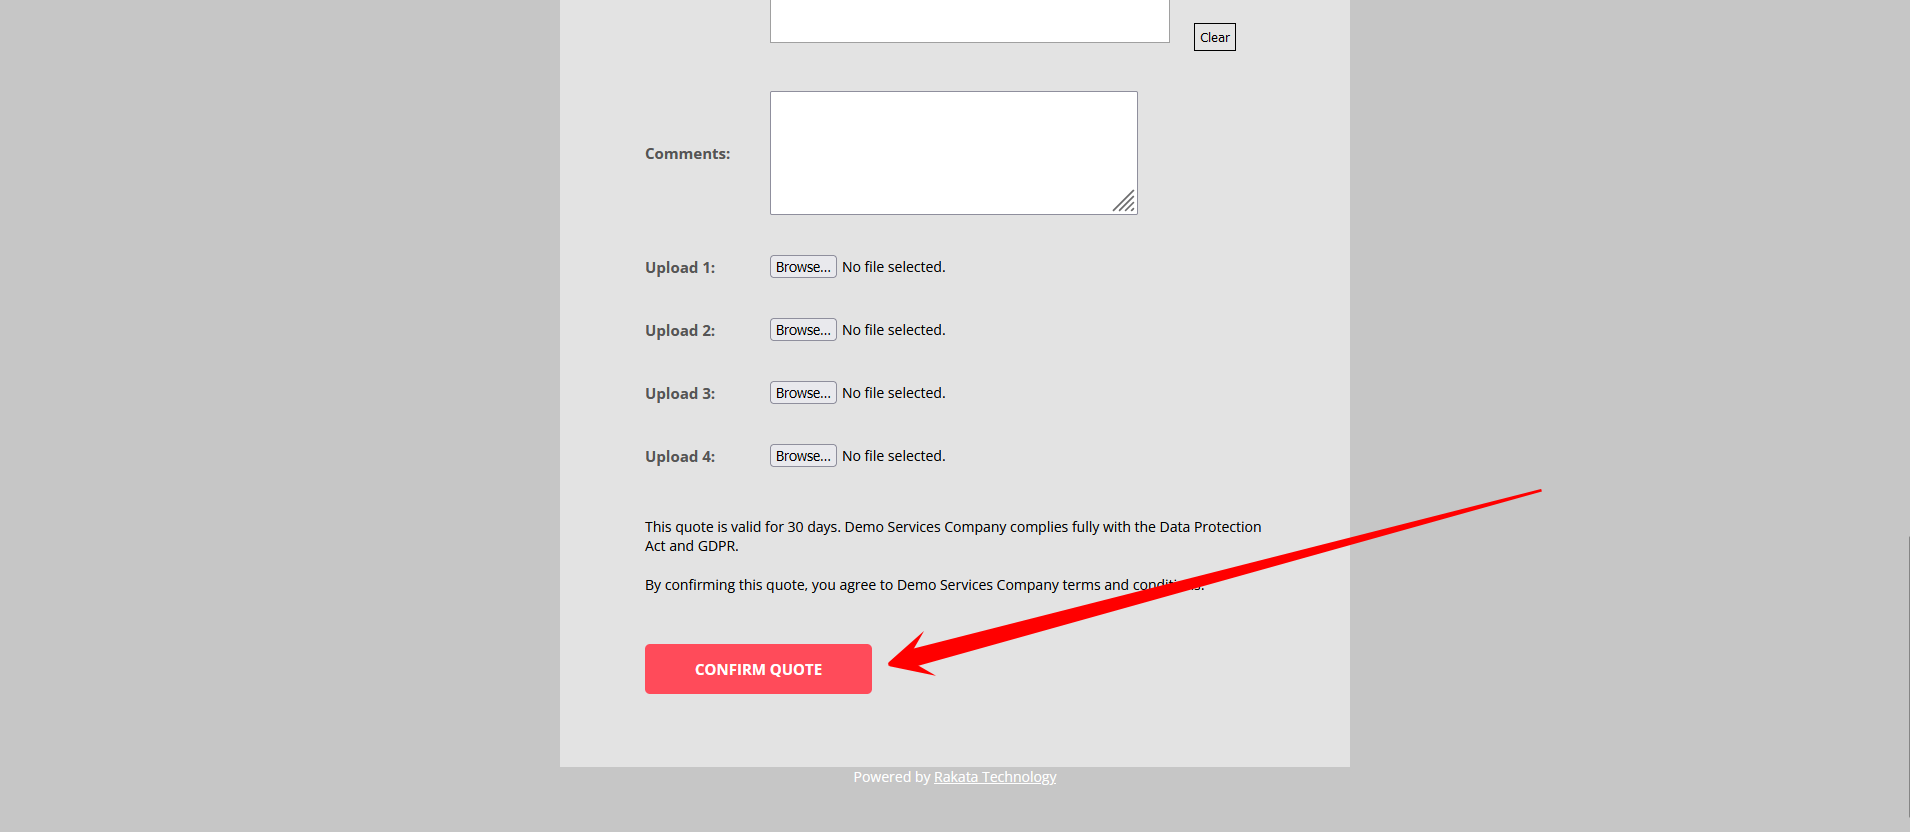
If you want to send for a digital signature & sign-off do the following:
Within the quote (whilst editing) set the status to "Send Quote to Customer to Sign" and click Save
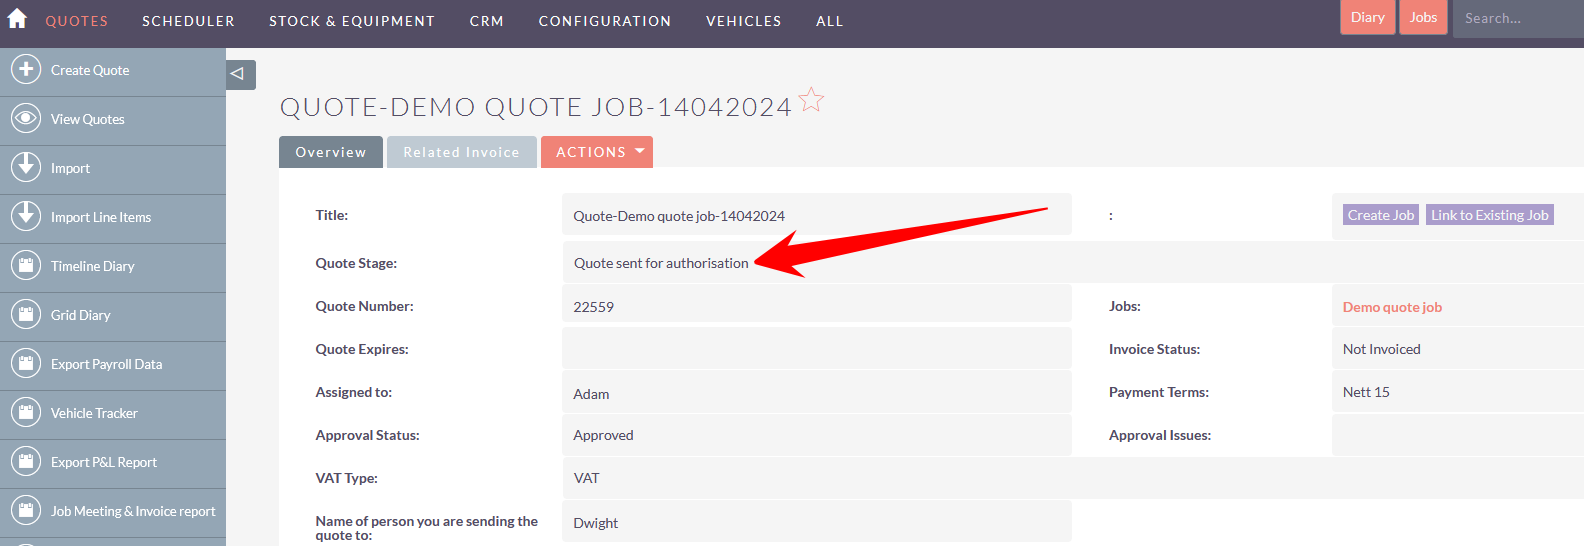
Once Saved you will notice that the status has changed to "Quote Send for Authorisation"
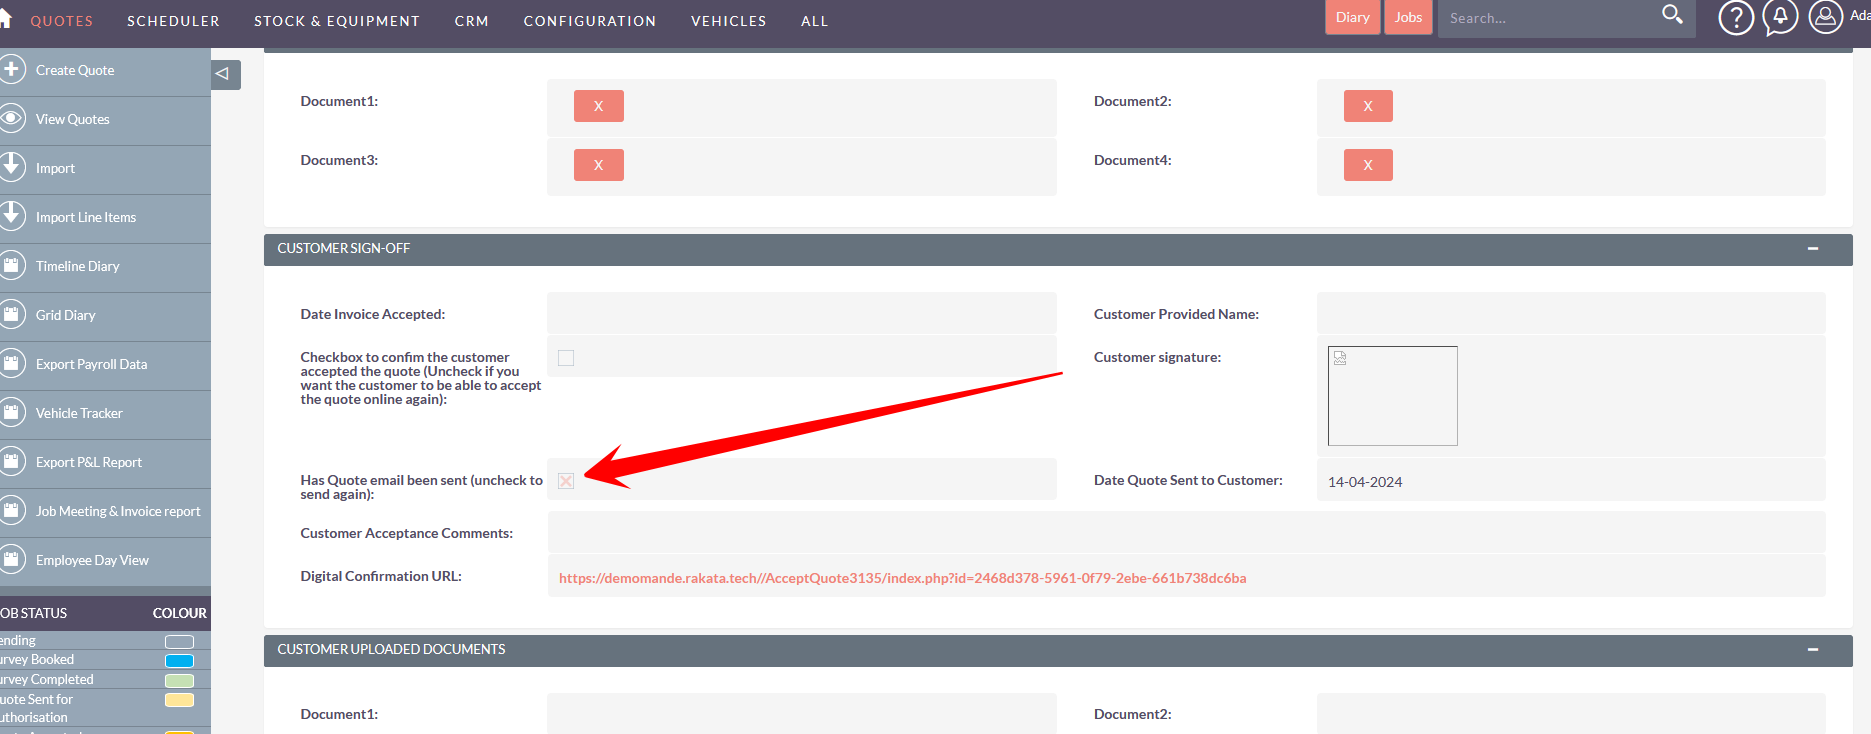
Tip: You can check if the quote has been sent by looking at the section called Customer Sign-Off. You should see a checkbox to confirm if the quote has been sent.
The customer can seen the quote and click the link to accept
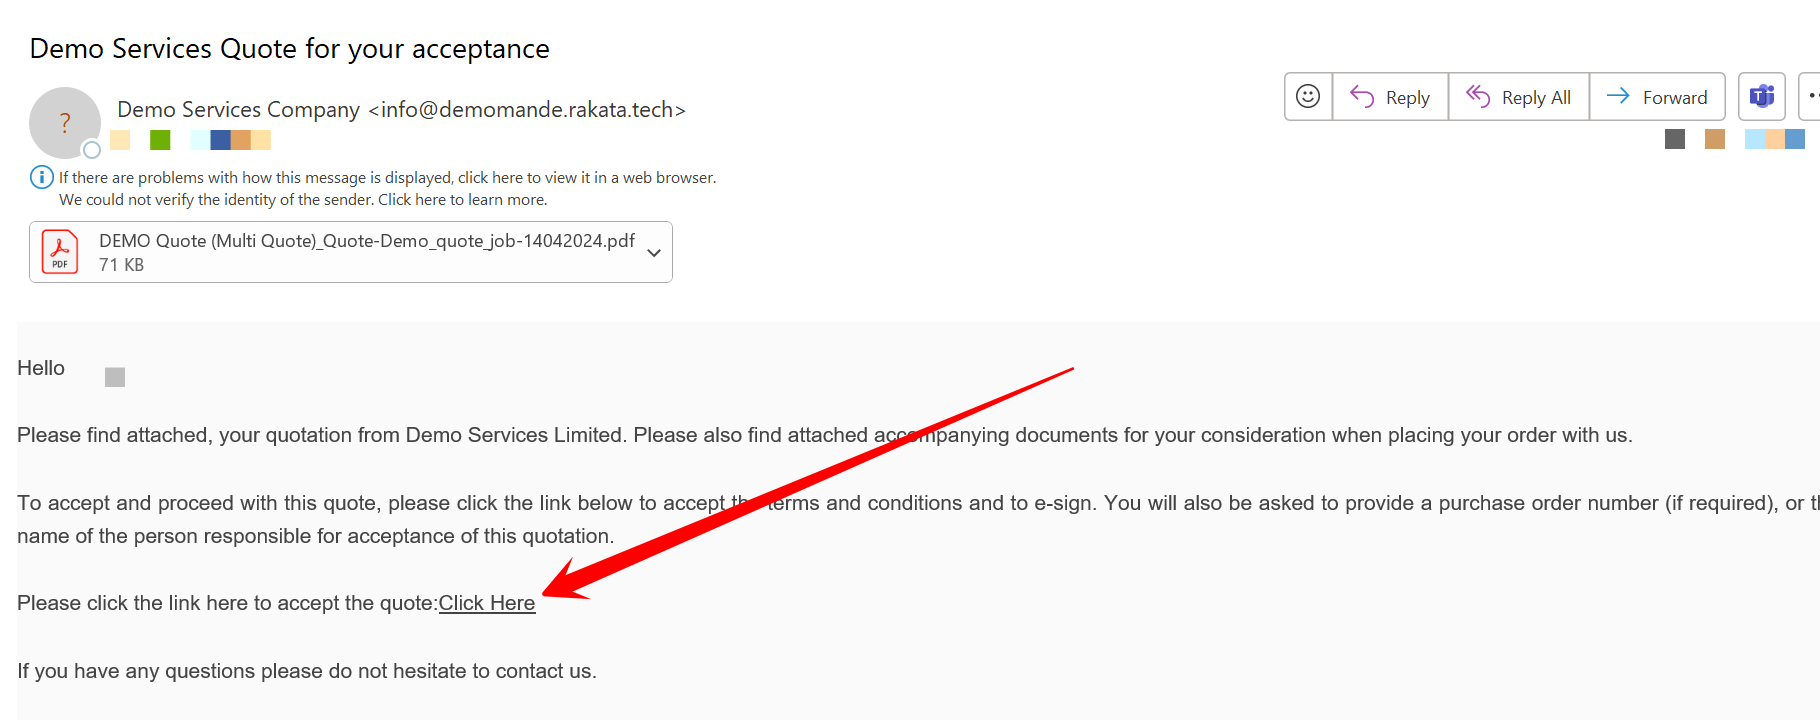
From here the customer can accept the quote
Tip: Once the customer has accepted the quote the Account manager will receive a quote accepted confirmed email to proceed to the next phase.
Booking an Engineer (Location Timing)
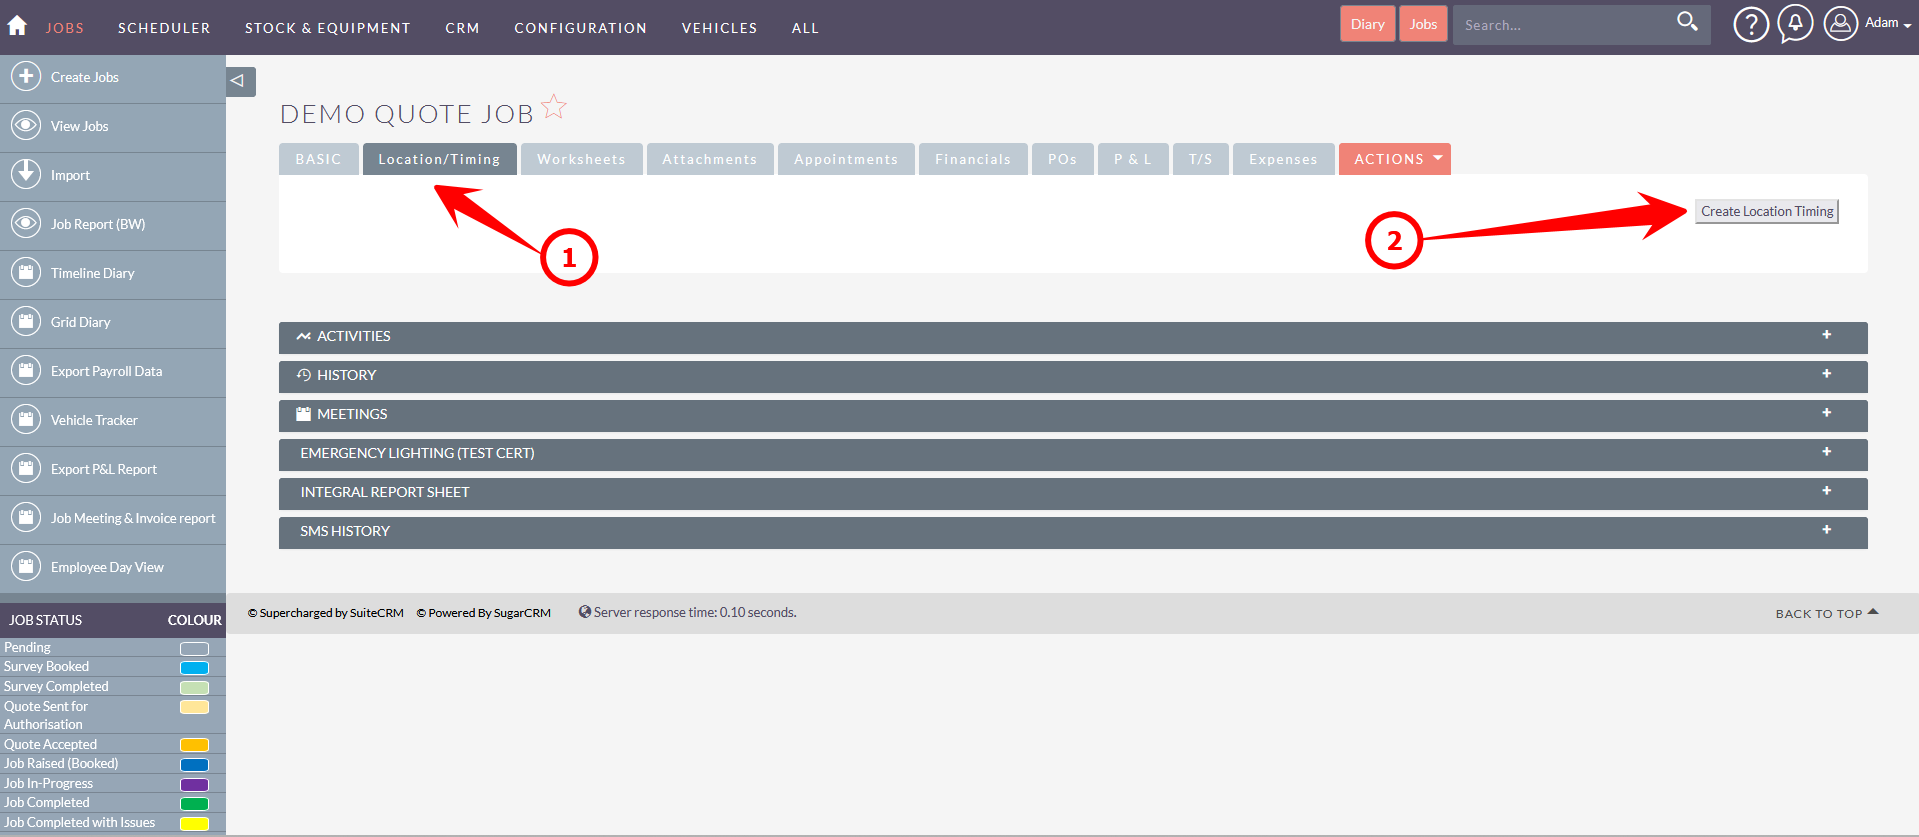
Once you are ready to undertake the work agreed it is time to book engineers to attend the job and undertake the work. To do within the job click on the Location Timings tab.
Location Timings > Create Location Timing
Tip: There is NO limit to the number of location timings and how you want to use them is upto you. You could create a different location timing for each engineer every day or a group engineers together and create create a single location timing over a number of days.
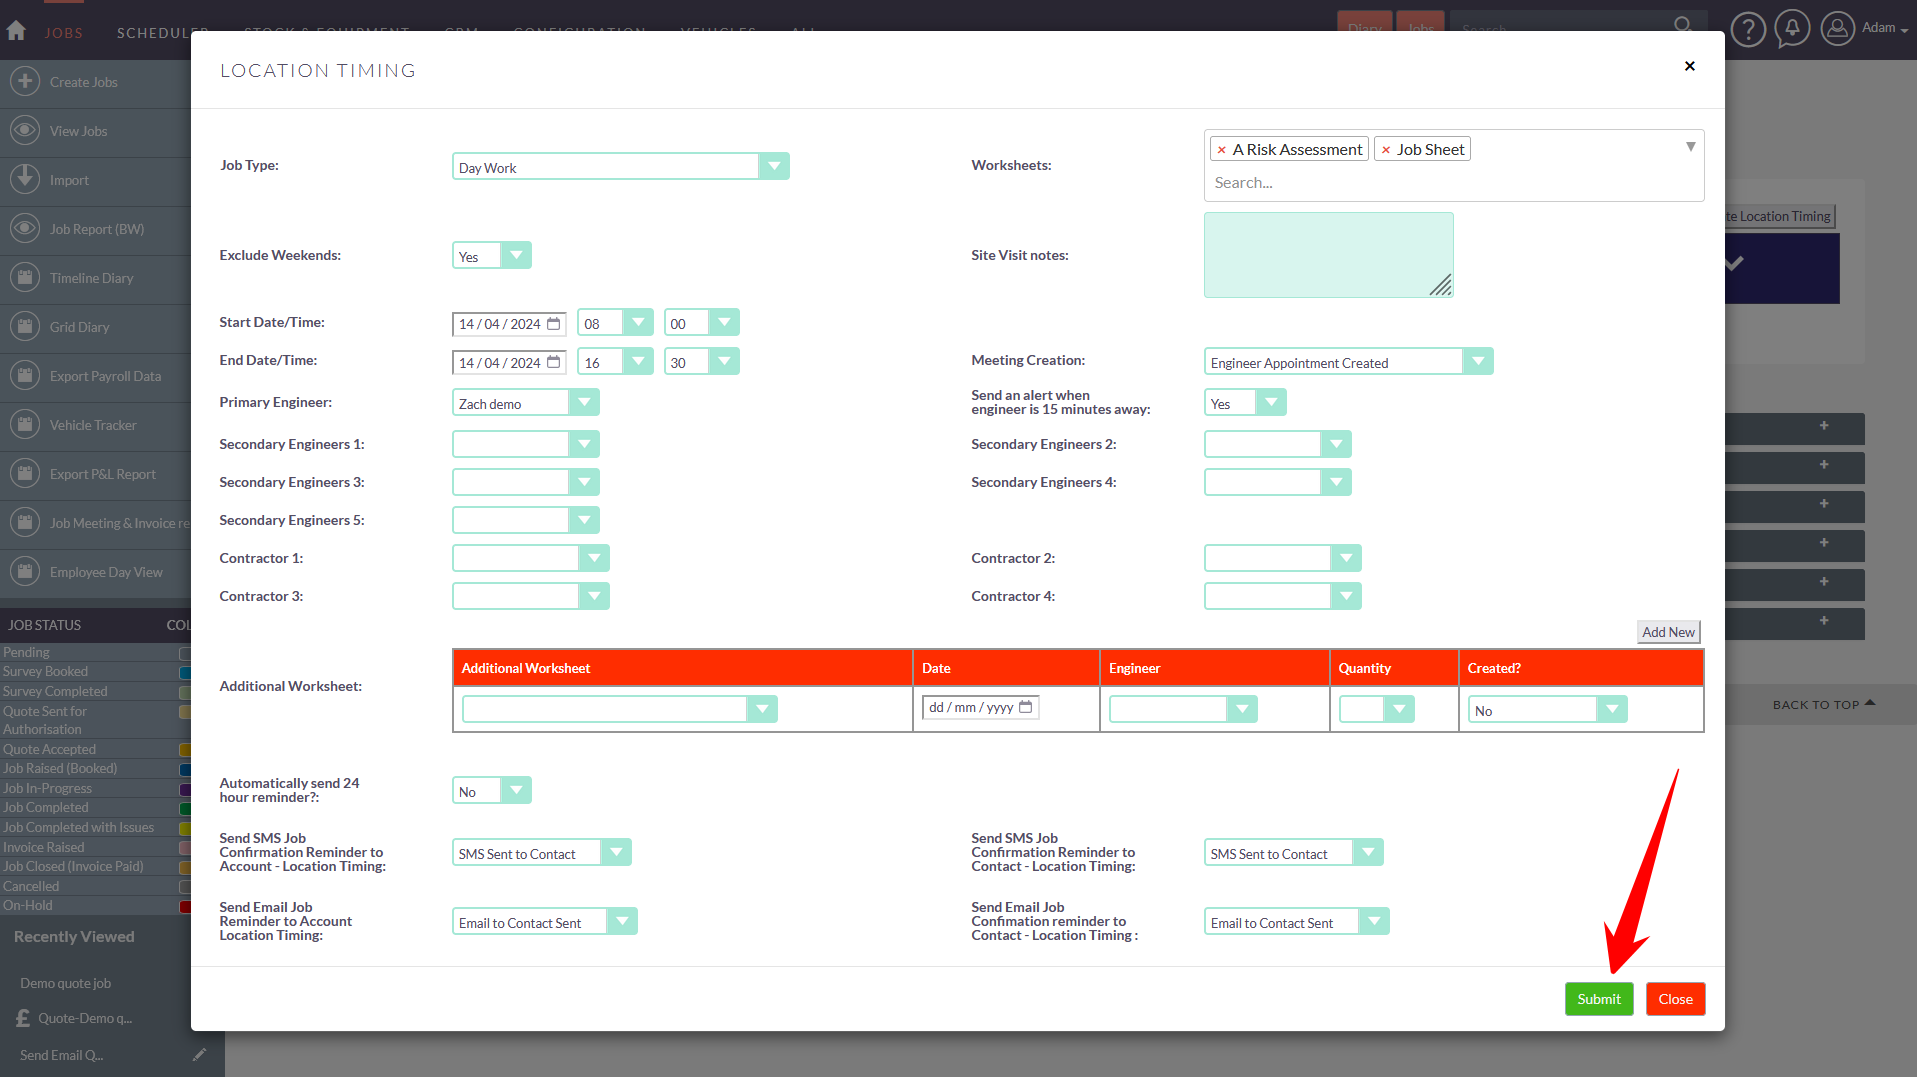
Set the paremeters for the Location Timing and click submit
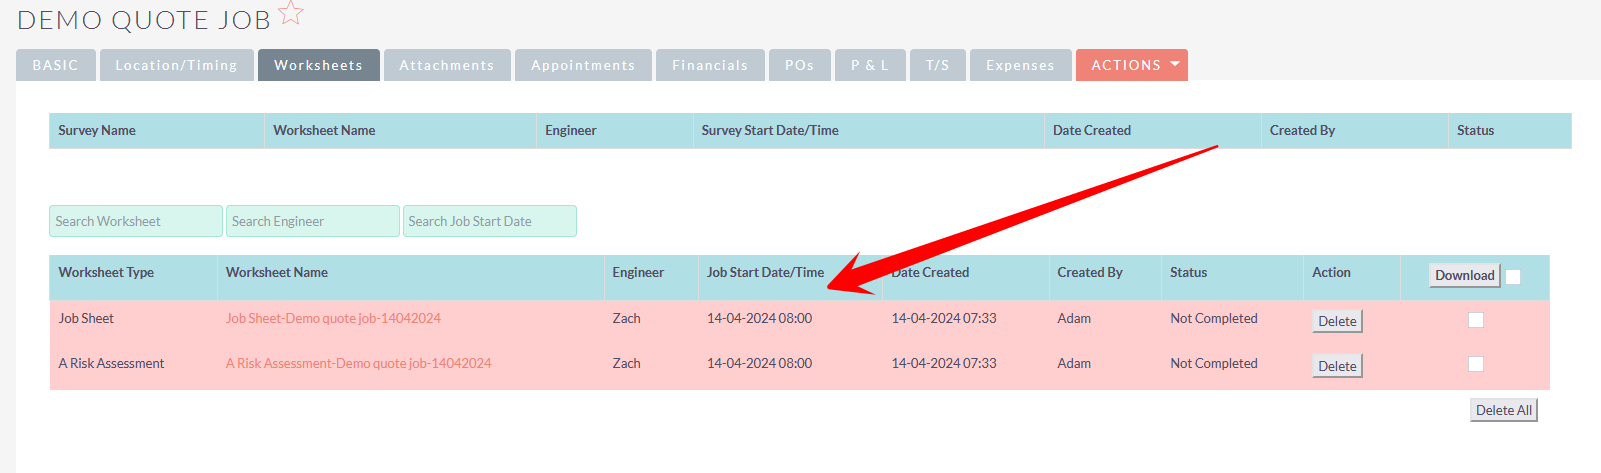
Tip: You can check if the Location Timing has created correct in 3 ways:
- Check the Appointments tab - has the appointment been created

- Check the Worksheets tab - can you see the worksheets for completion

- Look at the diary view - can you see the entry


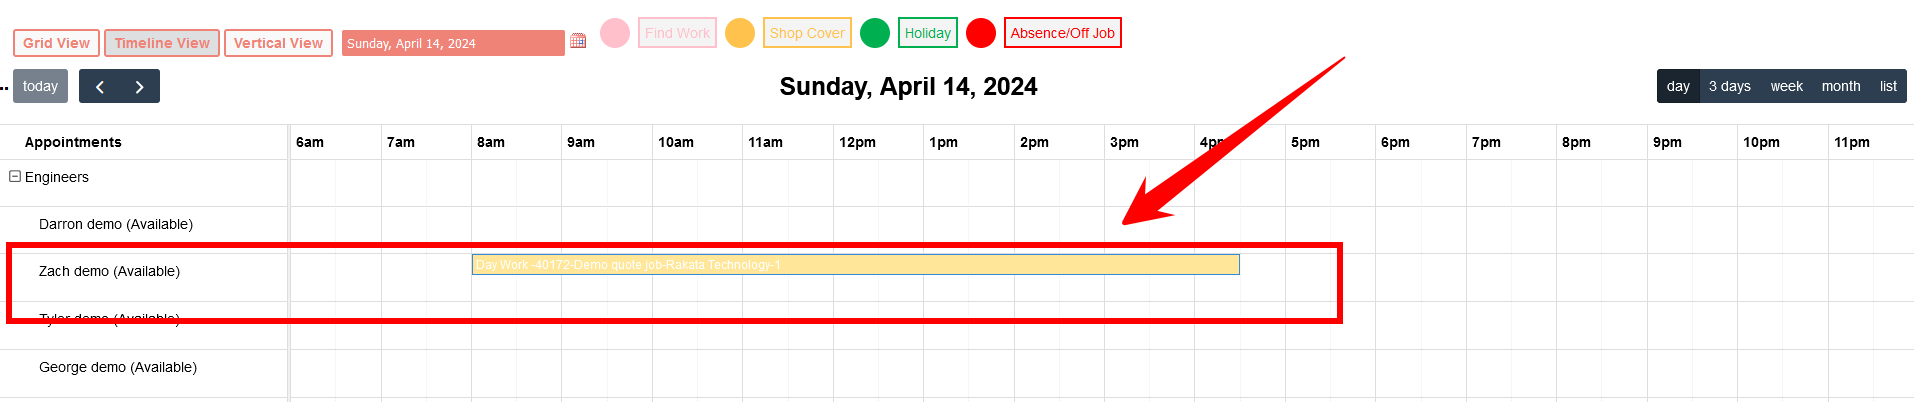
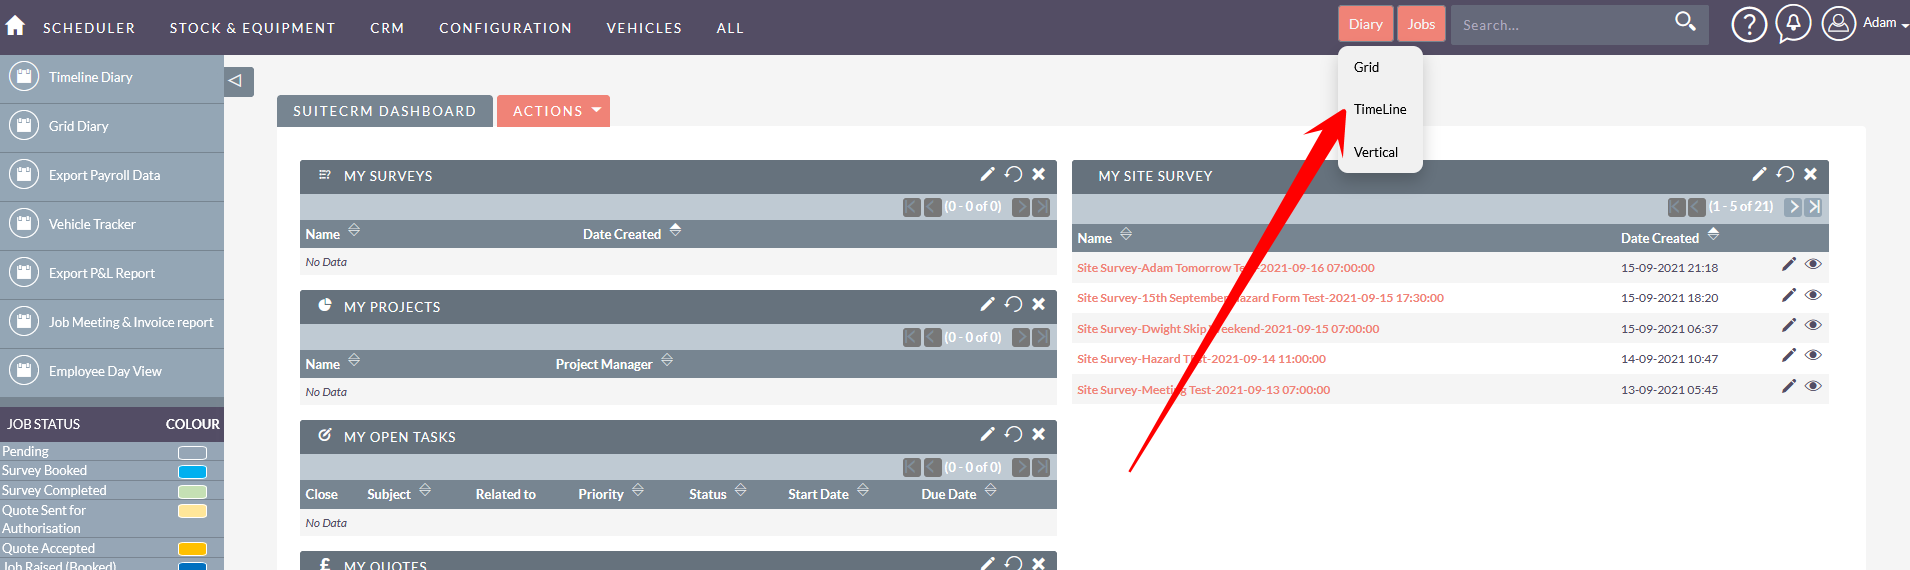
Reviewing the diary
The Diary view provides the best graphical view of the jobs being worked on that day.
To view the diary click the diary link and select the diary layout you want to view. There are 3 diary views to choose from. They all show the same data but presented in a difference way. The 3 diary views are:
Grid - A weekly view of all engineers set vertically
Timeline - All daily view of all surveyors and operatives laid out horizontally on a diary basis
Vertical - A vertical list of all operatives and engineers on a daily basis
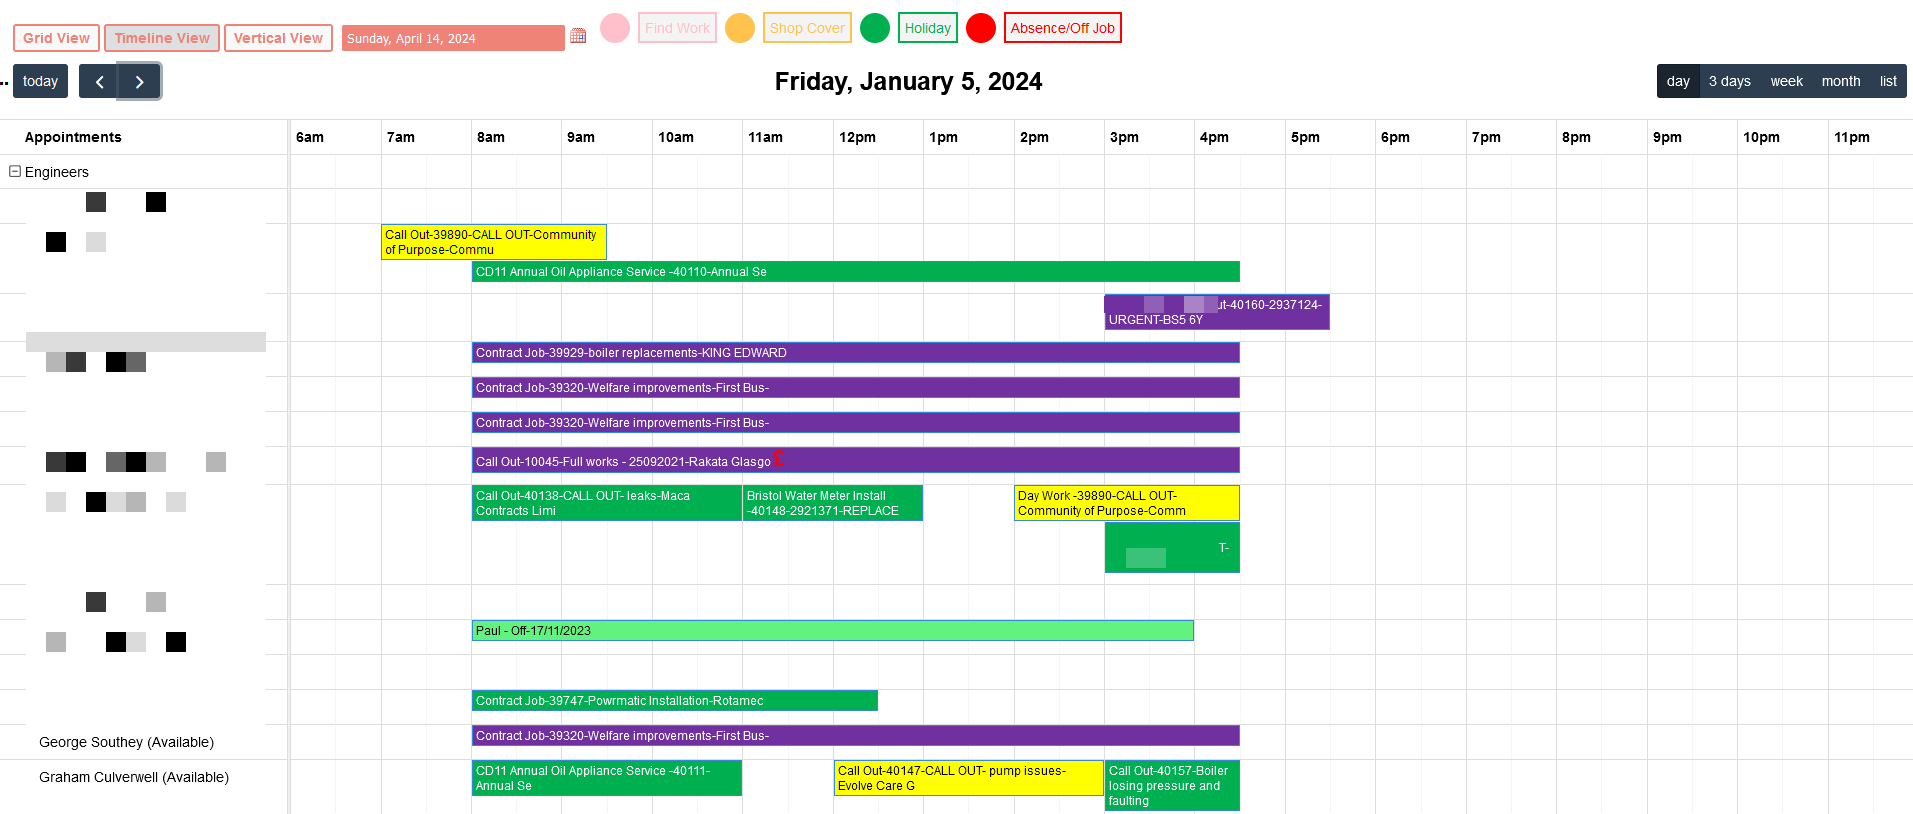
What is the diary showing
Each diary will show all jobs for the day with a colour code. The example below shows the status of per operative/engineer. The colour of a job changes automatically based on the status of a job.
Blue = Job Booked in (but not started)
Purple - Job in Progress (at least one worksheet has been started and saved)
Yellow - Job Completed but with issues
Green - Job Completed with no issues
Managing Job Time Events & Jobsheets
Engineers have to create time events to work on a any job. This provides complete transparency and detailed information on the number of hours taken to complete the job and the hours each engineer has worked on the job.
To view this click on the T/S tab of the job.
This will detail all the time events for that job and who the engineer was.
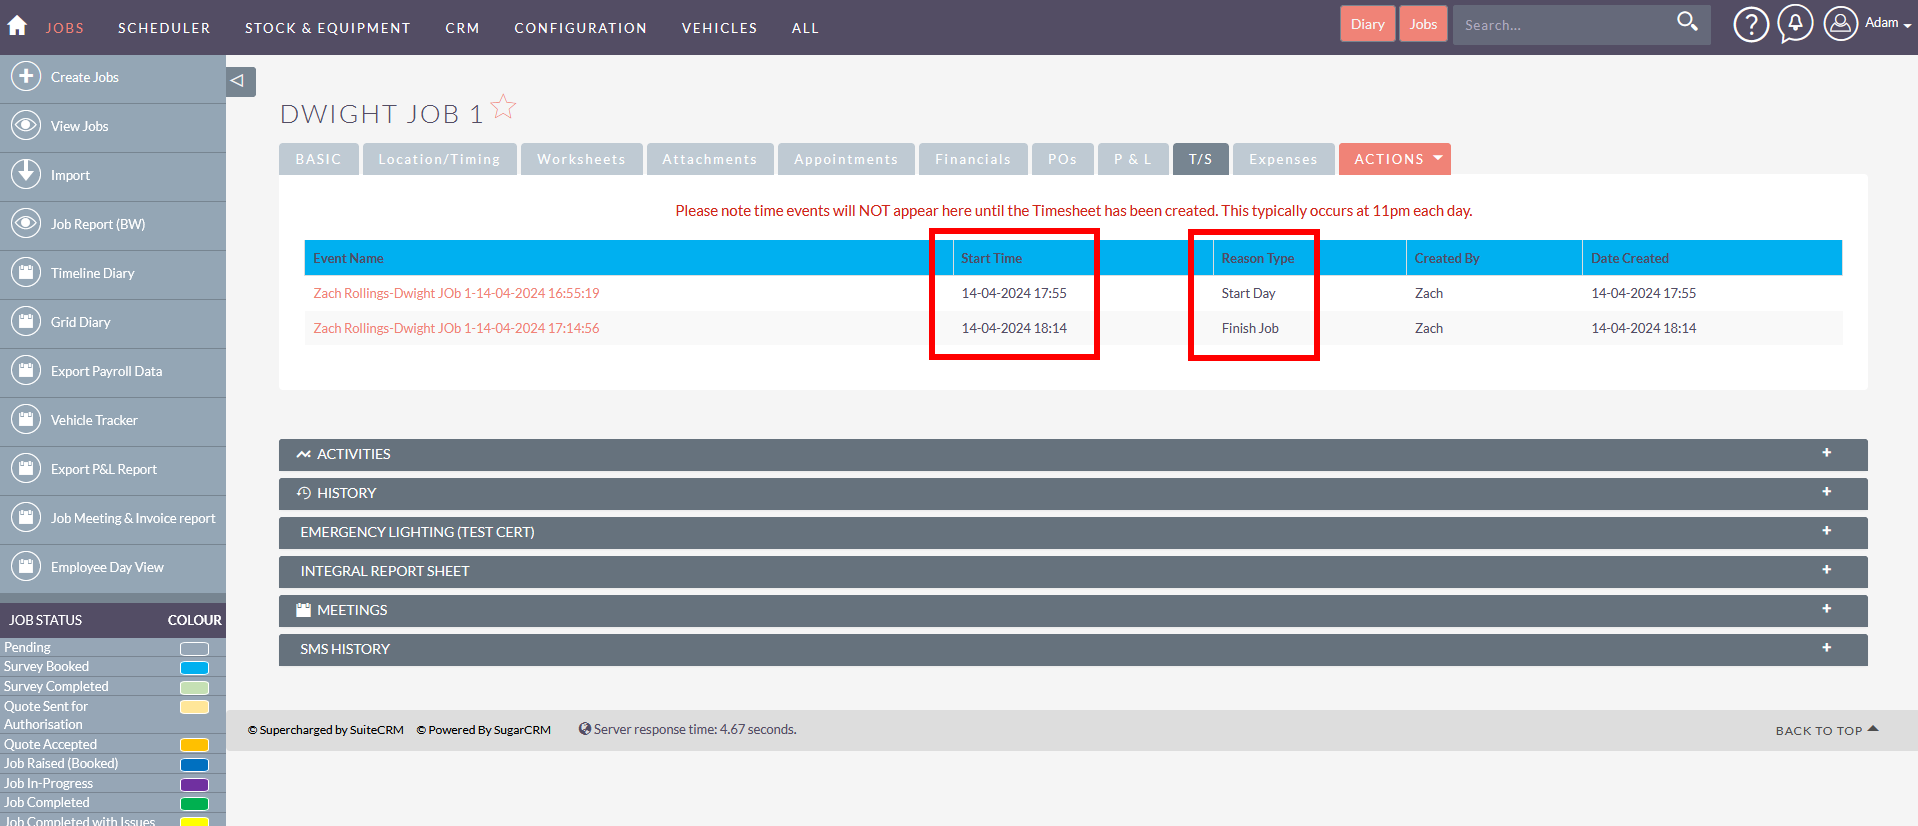
Top tip: Timesheets for each user are NOT created until 11pm each day.
Timesheets are created at 11pm. Looking at the T/S tab after 11pm will the related timesheet for the time events for each engineer who has worked on the job. The timesheet will show the hours each engineer has worked on the job.
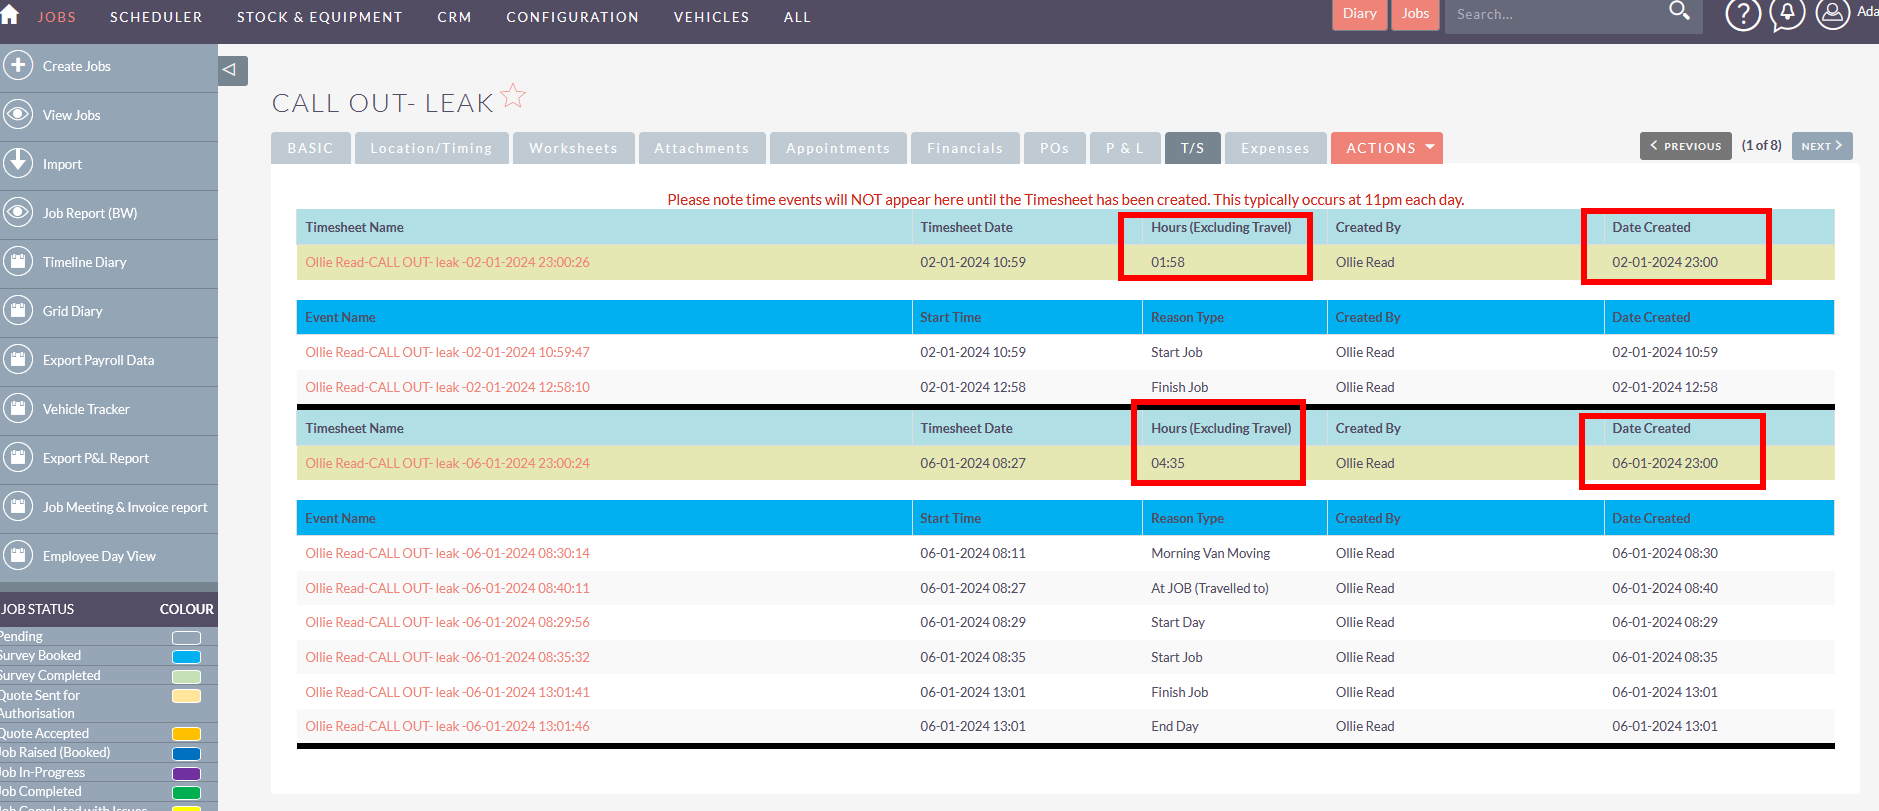
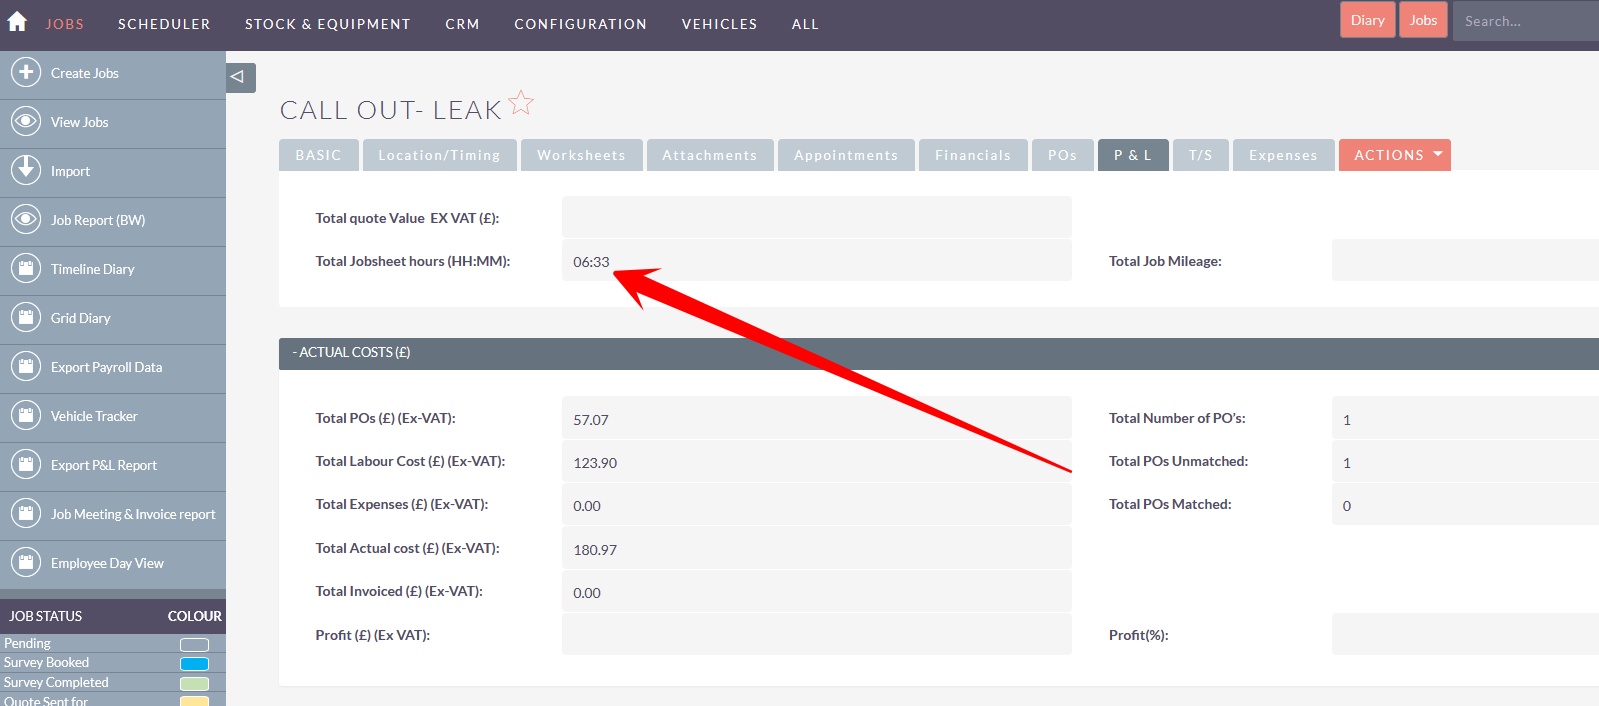
To get the total number of hours worked to date look at the P&L tab
Job Completion and Invoicing
The typical configuration to complete a job is to set the job status to "Job Completed" when a worksheets are either Completed or Completed with Issues".
In the example below the Job will be set to Completed once Zach has completed both worksheets.
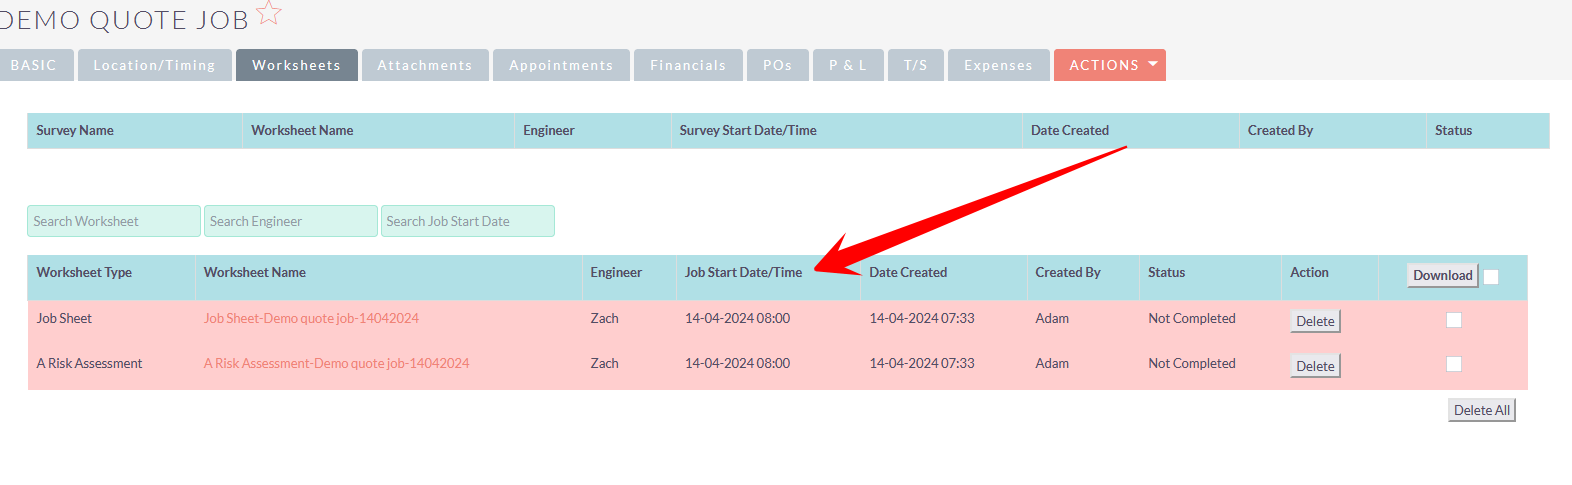 TIP: There are instances where a job may have hundreds of worksheets. The Job status will update to "Job In-Progress" as soon as any Worksheet is started or completed. The status of "Job In-Progress" will remain until all Worksheets are Completed. This status could remain for weeks or even months depending on the length of the job.
If for any reason a Worksheet is never completed and never will be completed then either those worksheets must be deleted or the adminstrator will need to override the Job status and set the job status as "Completed" or other appropriate status.
Invoicing the Job
Once the job is complete and you are ready to invoice for the job there are two options.
- Convert an existing quote to an Invoice
- Create an invoice directly
Convert and existing quote to an Invoice
If the job was based on an accepted quote, from the Financials tab click on the Convert to Invoice link. This will convert the quote to an invoice with the same values which you can then send to the customer.
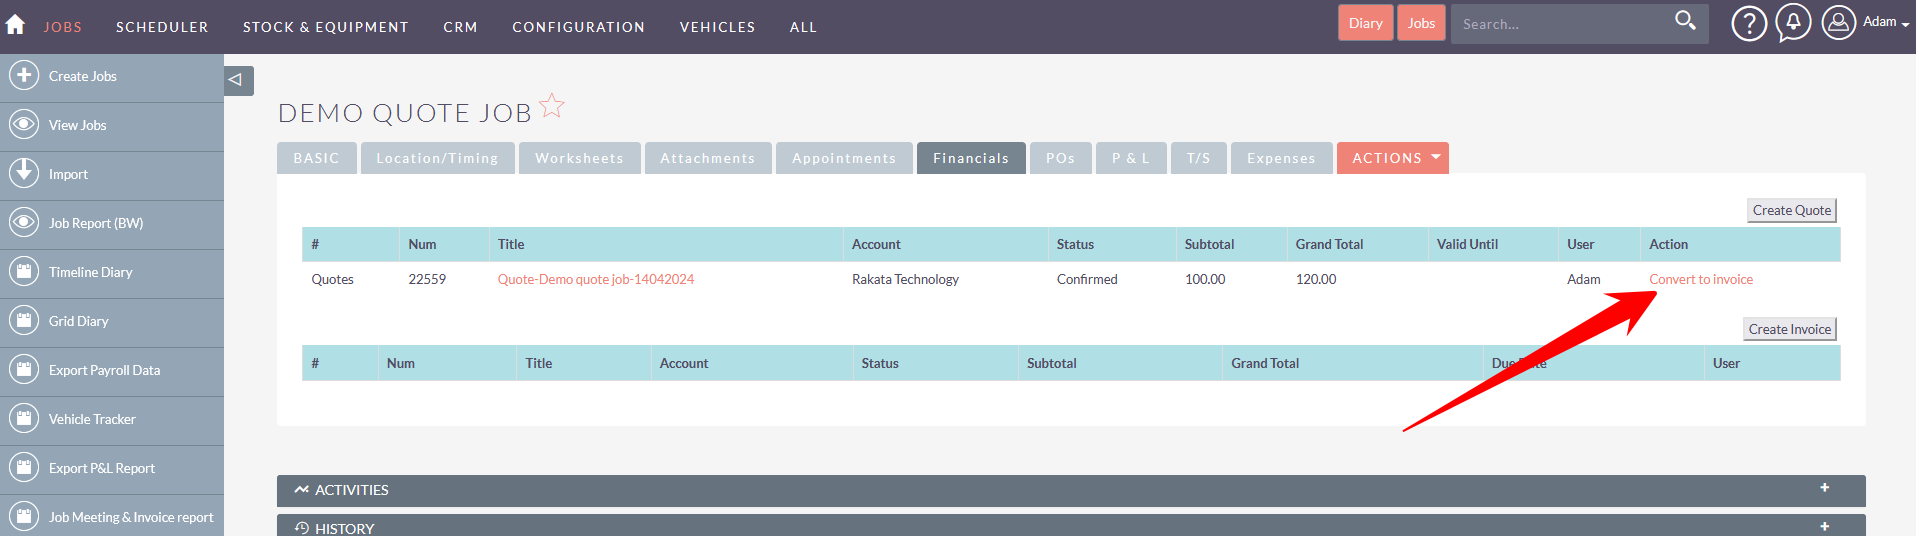
From within the invoice record this can then be downloaded as a PDF or sent to the customer directly from the CRM.
Syncing with the Finance System
RakataCRM can sync invoices with:
- Xero
- QuickBooks
- Sage Line 50
How does the sync work?
Once an invoice is created at a agreed time the system will sync all invoices into your Accounts system of choice. When the sync scheduler runs it will sync all invoices that are set to Yes for the sync.
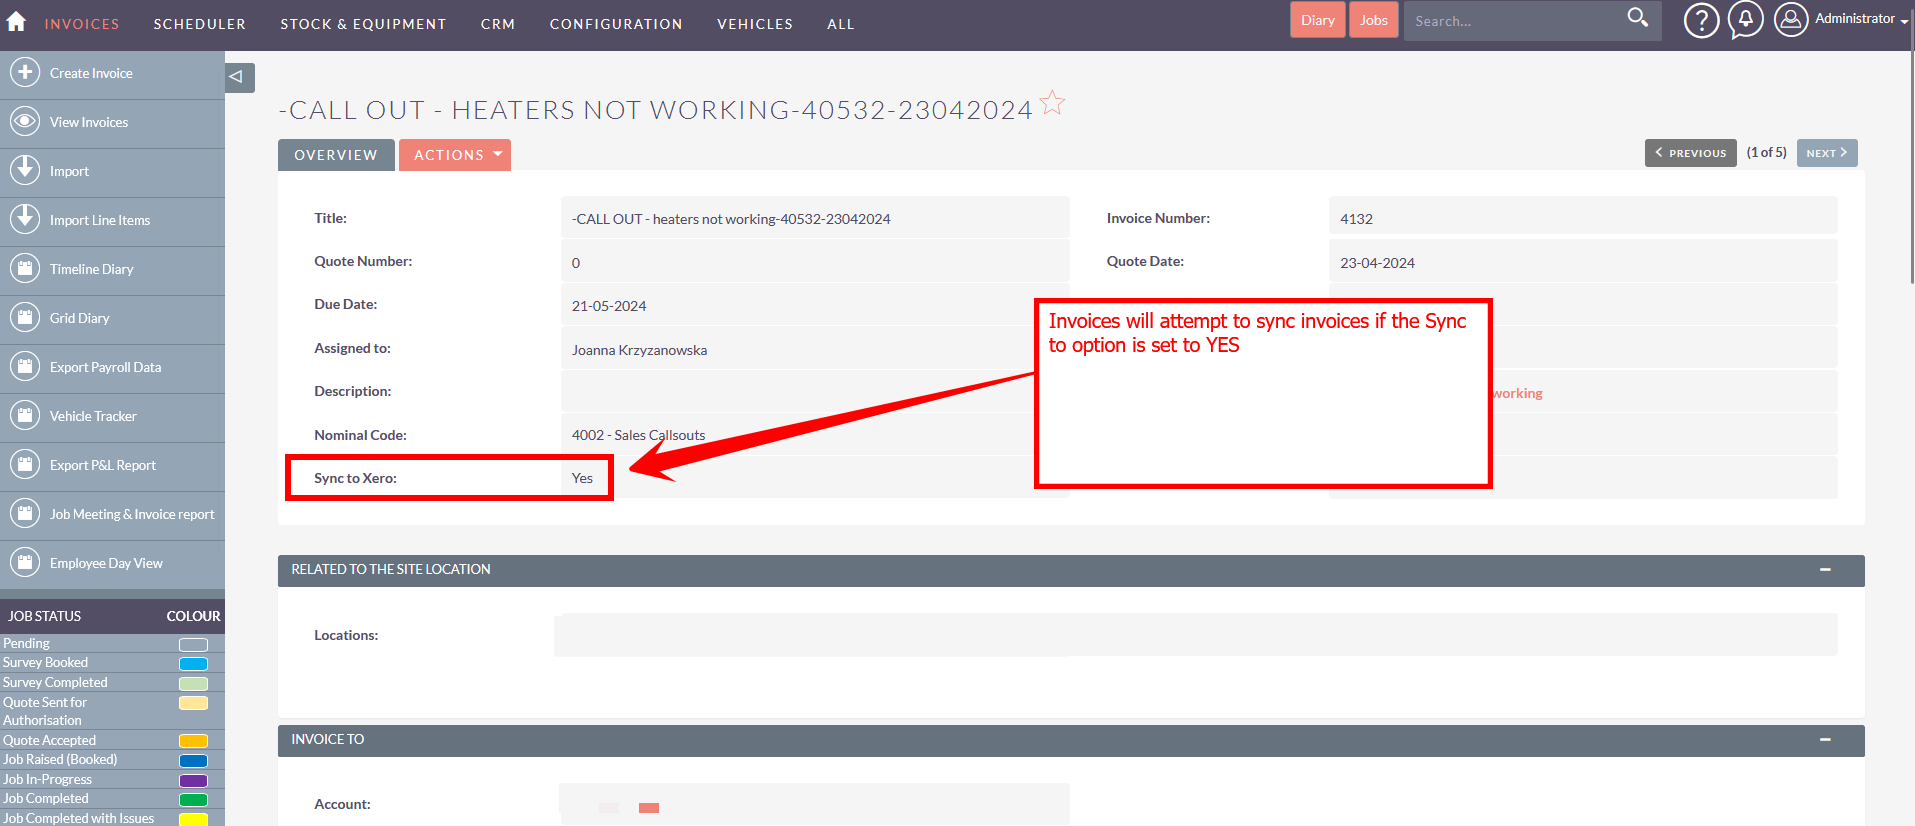
NB: The scheduler to run the sync can be configured to run at various times of the day. For example some only run the sync at 6pm each day. This provides time to make any adjustments to invoices during the working day. Other sync every hour or less.
Invoice Creation Sync Reponse
Once the invoice is synched within the Accounts system the invoice record will be updated with a reponse text to confirm the invoice was synced. Details can be found in the Panel called "Import Detail". This will show response text and any other relevant information specific to that the Accounts system you are using.

Update Invoice Paid Status
The system will daily request an Invoice status from the Account system to check if the Invoice is marked as paid or part paid. As soon as the invoice is marked as Paid (and the update scheduler has run - typcially once a day) within your Accounts system the invoice within Rakata CRM will also be marked as paid.
Timesheet review
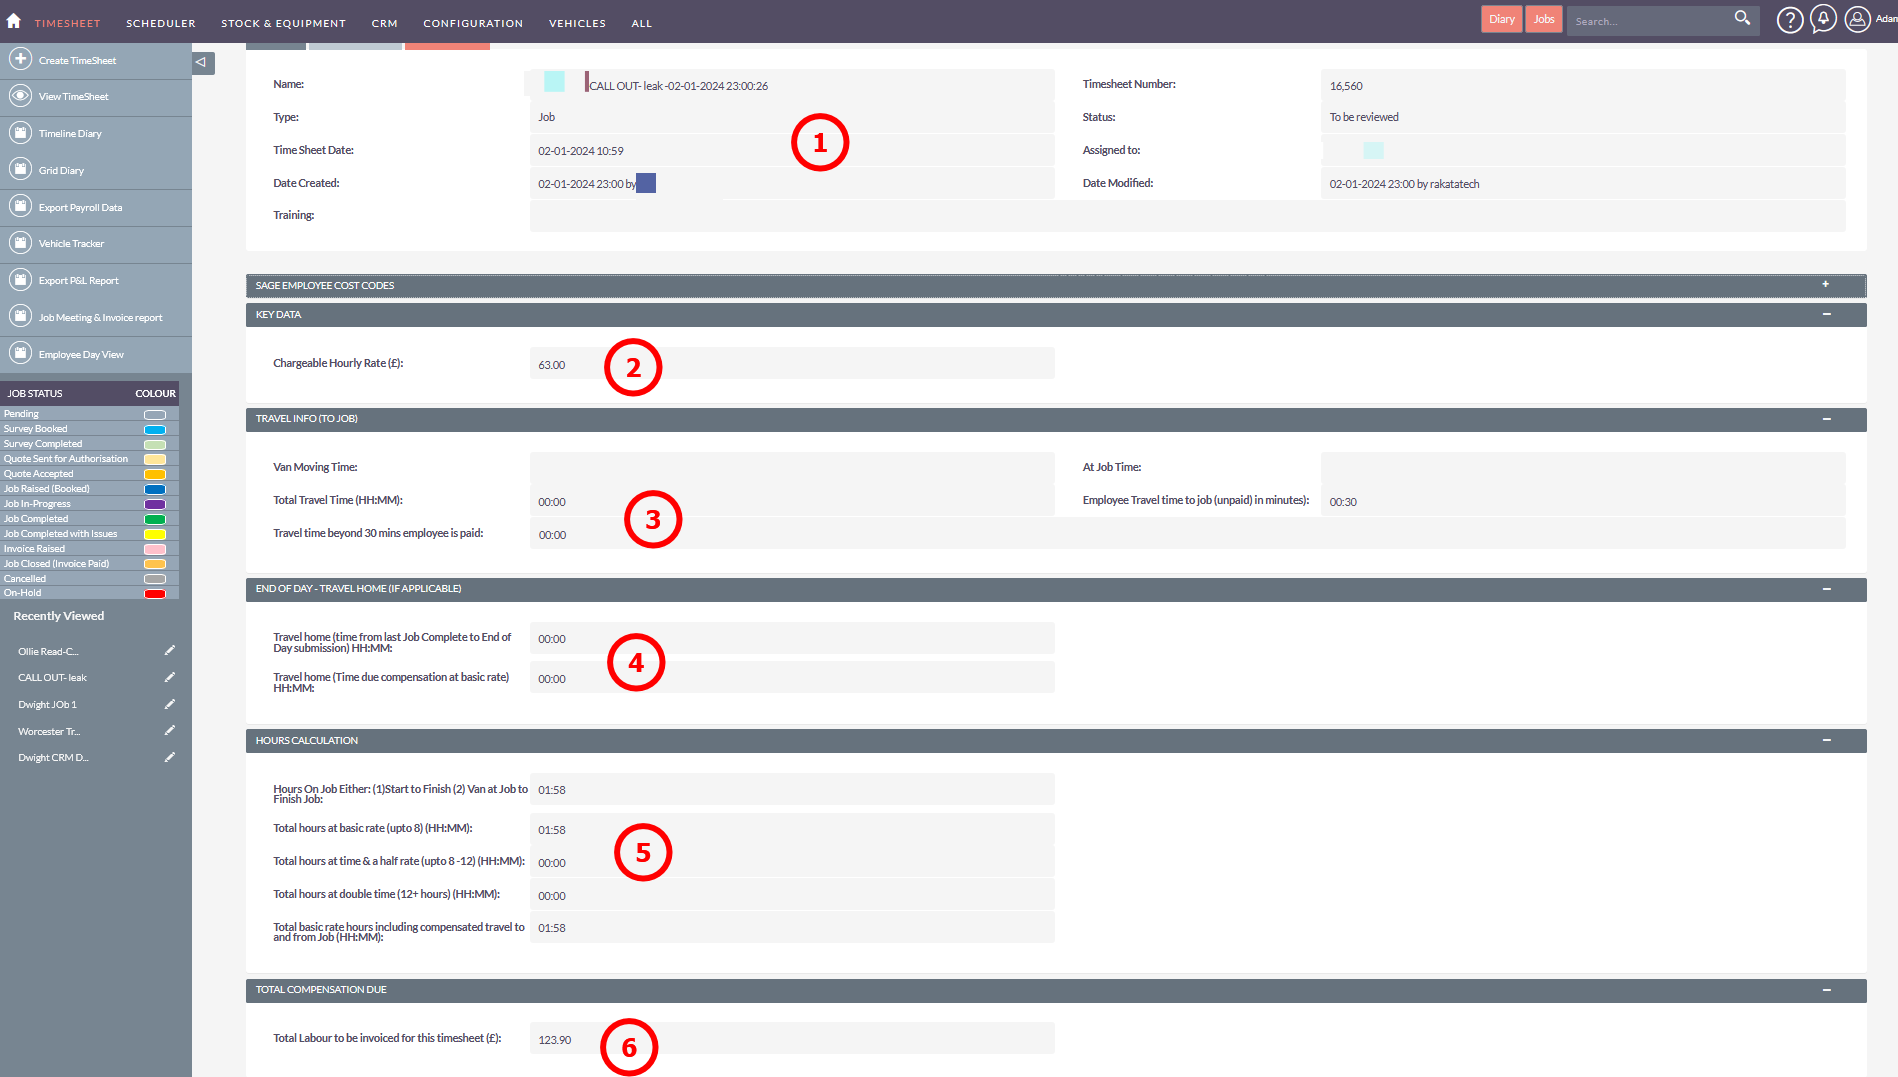
Once the timesheet has been created this will include labour calcuations based on the time events for that job. These are:
- Timesheet details
- Operative hourly rate at the time of the timesheet hourly rate
- If the GPS and Vehicle integration is used and if this it either the first of last job of the day vehicle data will be recorded within this area
- If the timesheet is last timesheet of the day this will be recorded here
- The worked hours are recorded in the hours calcualtion tab
- The total compensation value due to the engineer is recorded in the total compensation due tab
Exporting Payroll
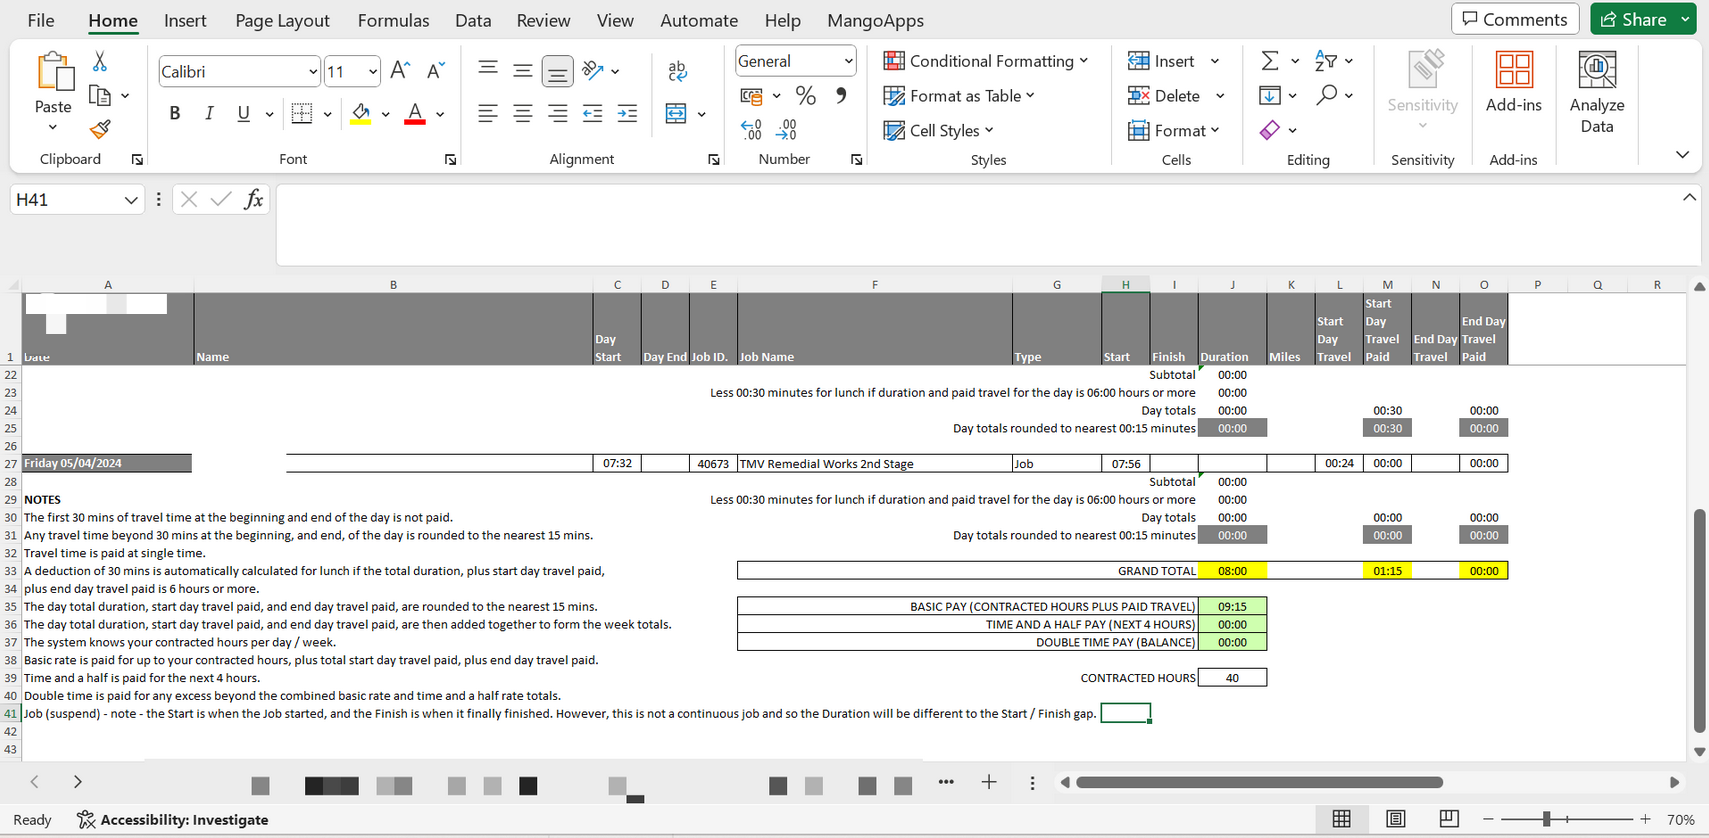
Creating payroll extracts that meet every customers needs is very complex. Every customers payroll needs differ and therefore it is highly likely that Rakata will tweak the payroll extract to suit your needs. Once this is exported the Payroll extract will provide all data and calcuations for each employee for each day and job.
Export the Payroll file
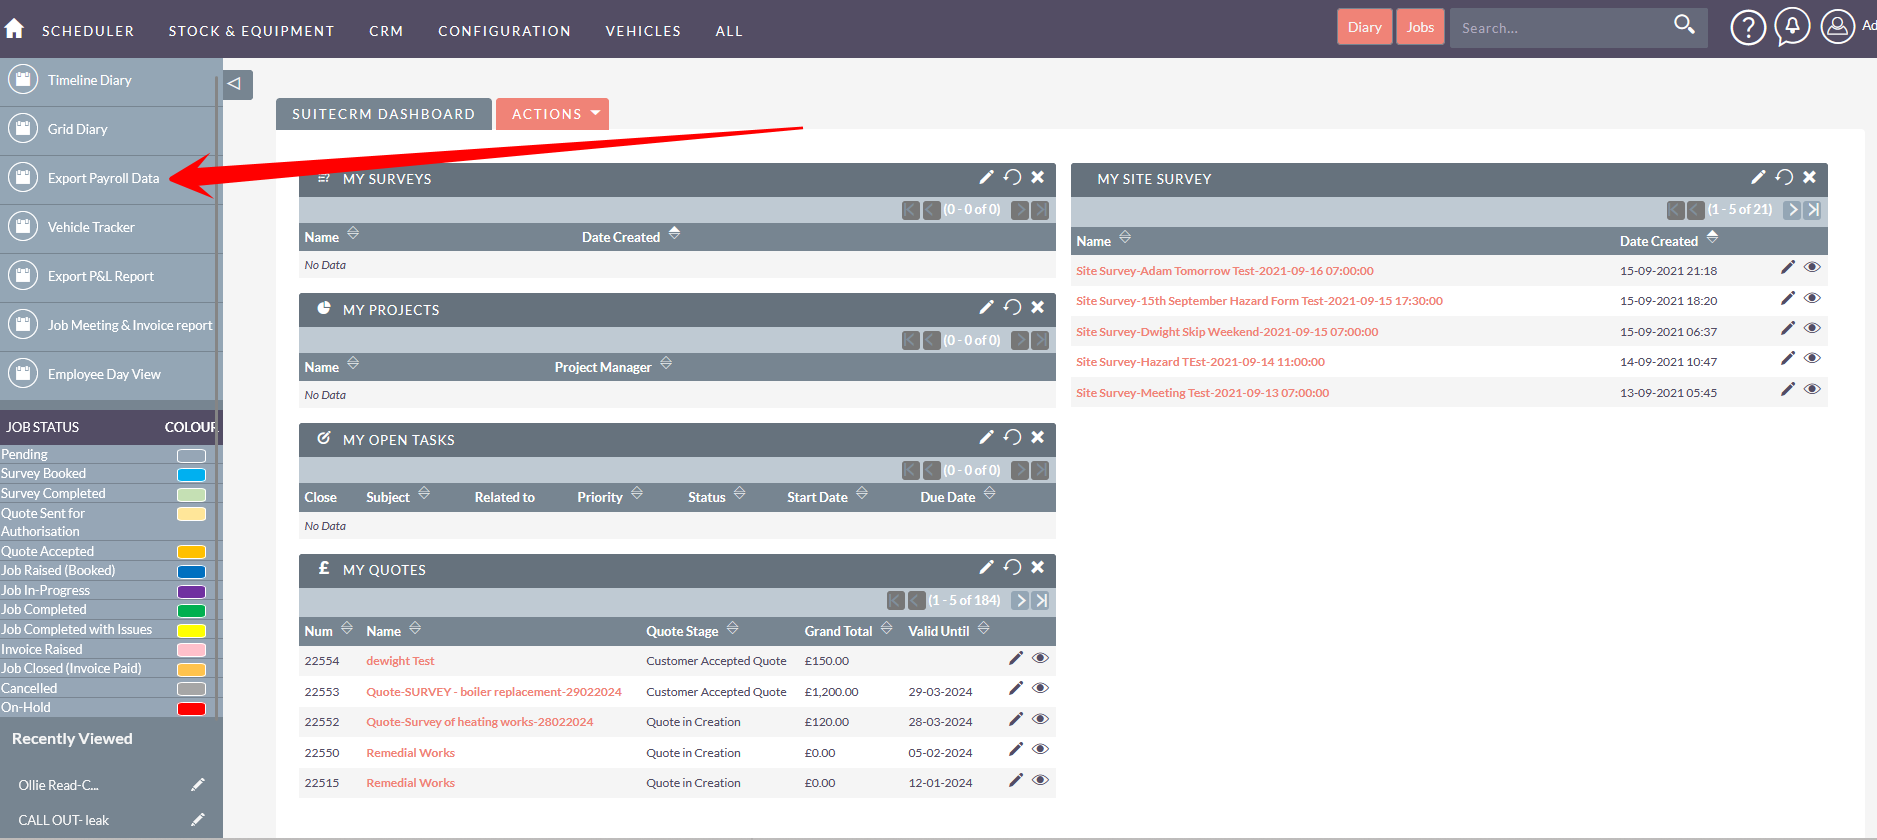
Export the file

Top tip: If the submitted date range is NOT a Monday > Sunday period, then the footer will not be printed on the report as overtime is calculated weekly.
The breakdown is presented as follows: